P5
CHARACTER CREATION

Step 1
Import the character T-pose drawing which I downloaded from the internet because my character is a humanoid male therefore I used a character T-pose from the internet
Step 2
Create a primitive cube by selecting the cube icon in the polygon toolbar. When this cube is created you then need to move it by using the HOTKEY W and drag the arrow up to the head area of the character.

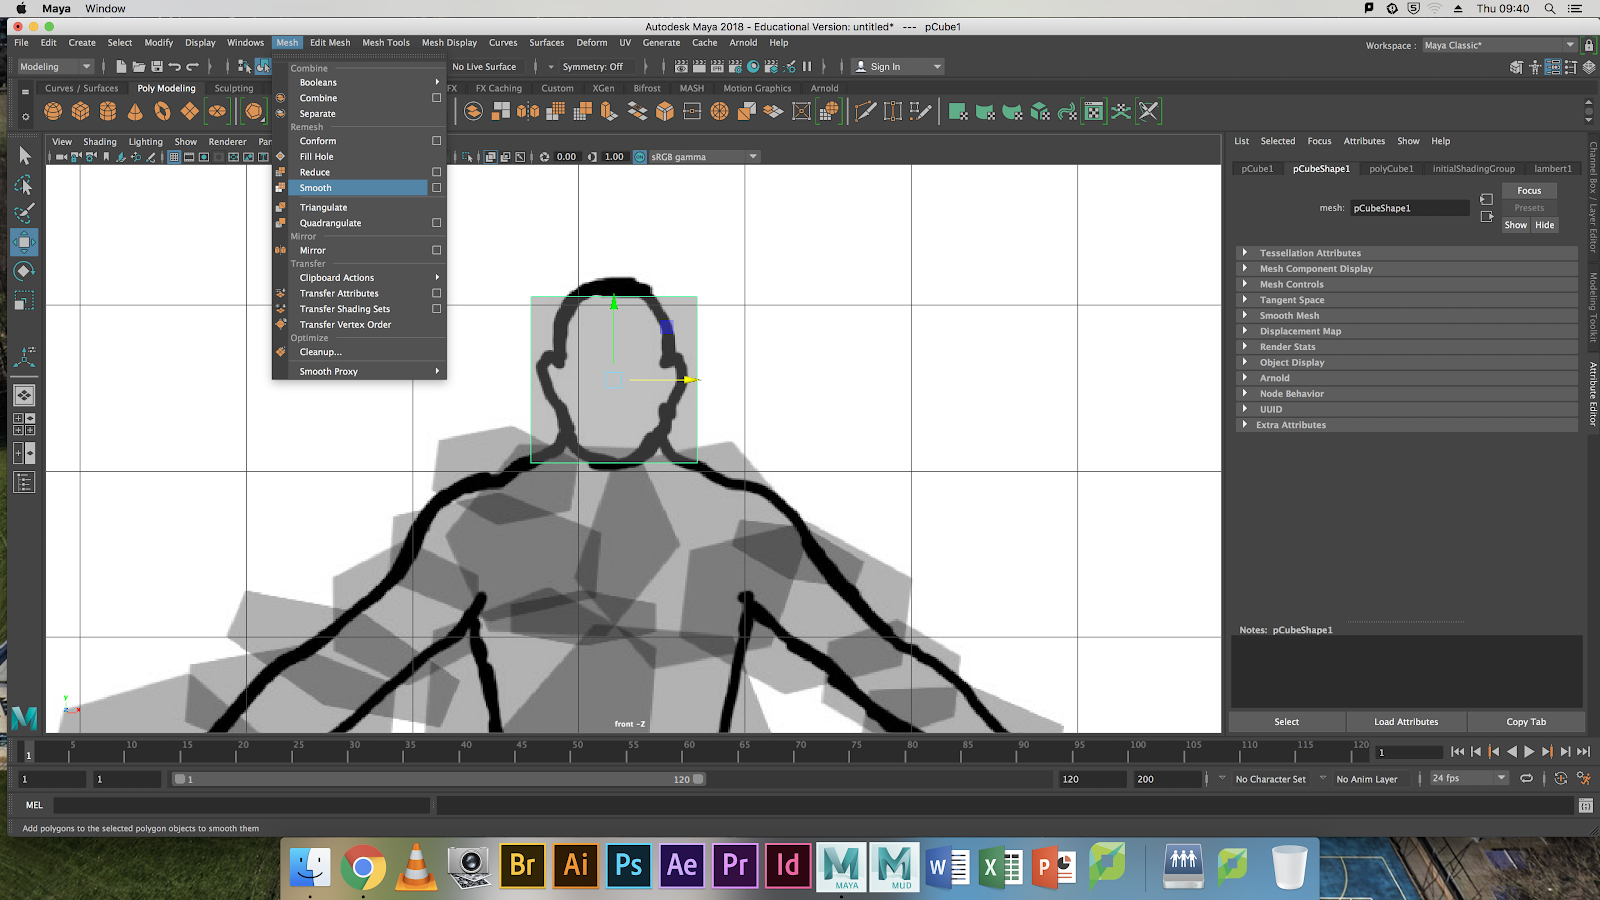
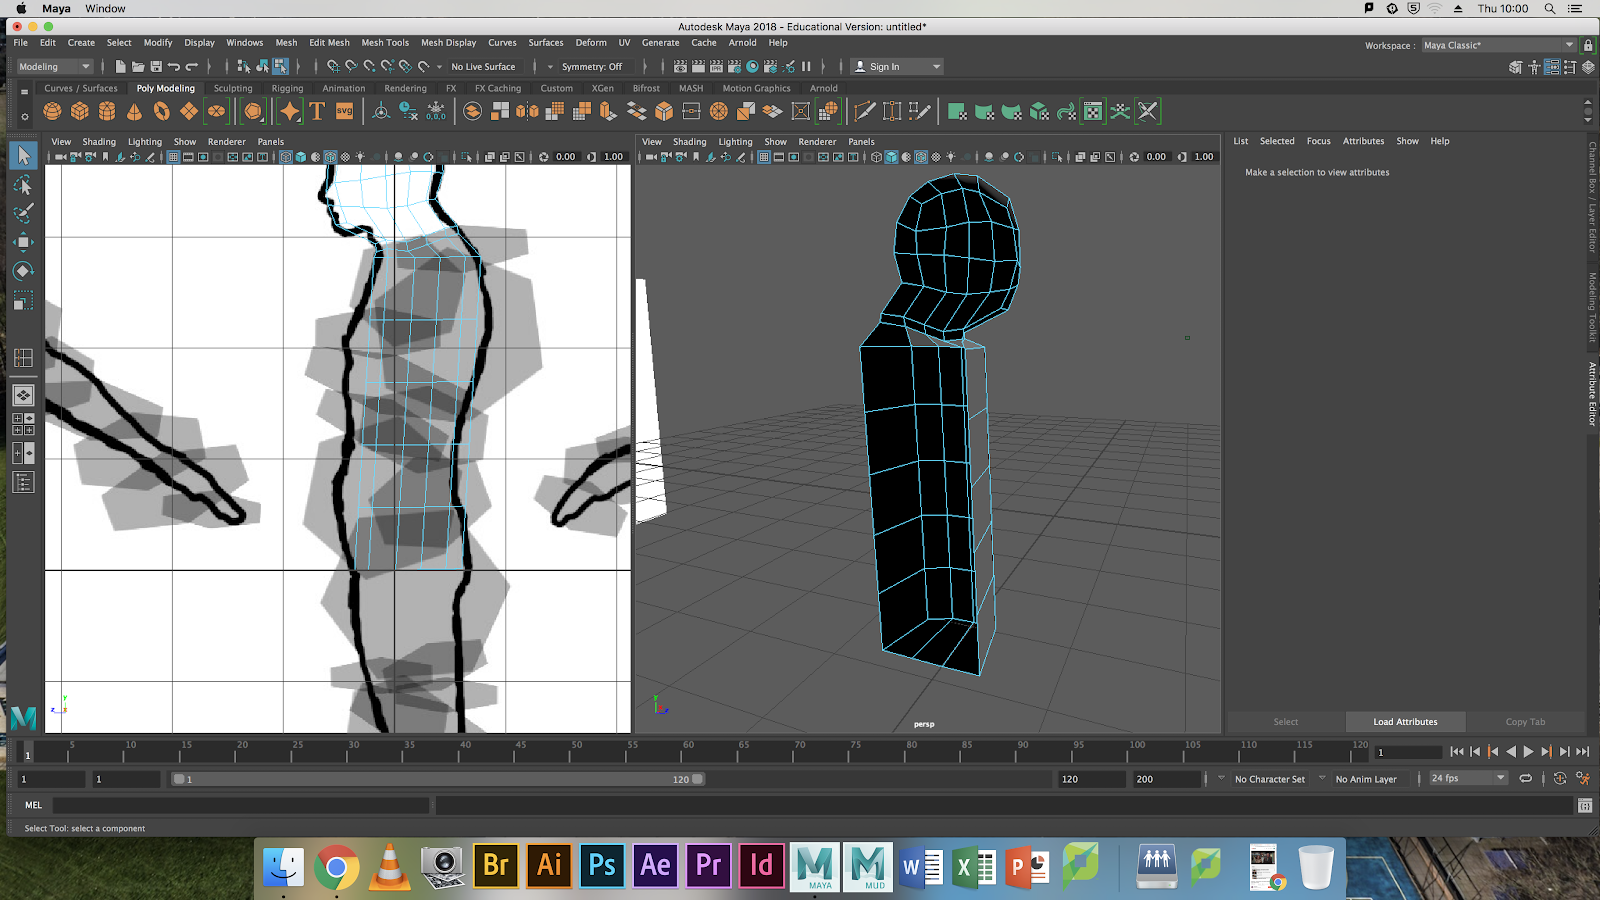
Step 3
Subdivide the cube by smoothing the cube by going the Mesh>Smooth. This smooths the cube creating a poly-sphere which will be used to create the rest of the body.
Step 4
Add subdivisions to the poly-sphere to create more subdivision and faces. To do this go the Toolbar>Edit Mesh>Subdivision Tool. Add enough edges to extract the faces to create the rest of the body and arms and legs. This ensures that the mesh is low Polly and can be easier to weight paint and then animate.
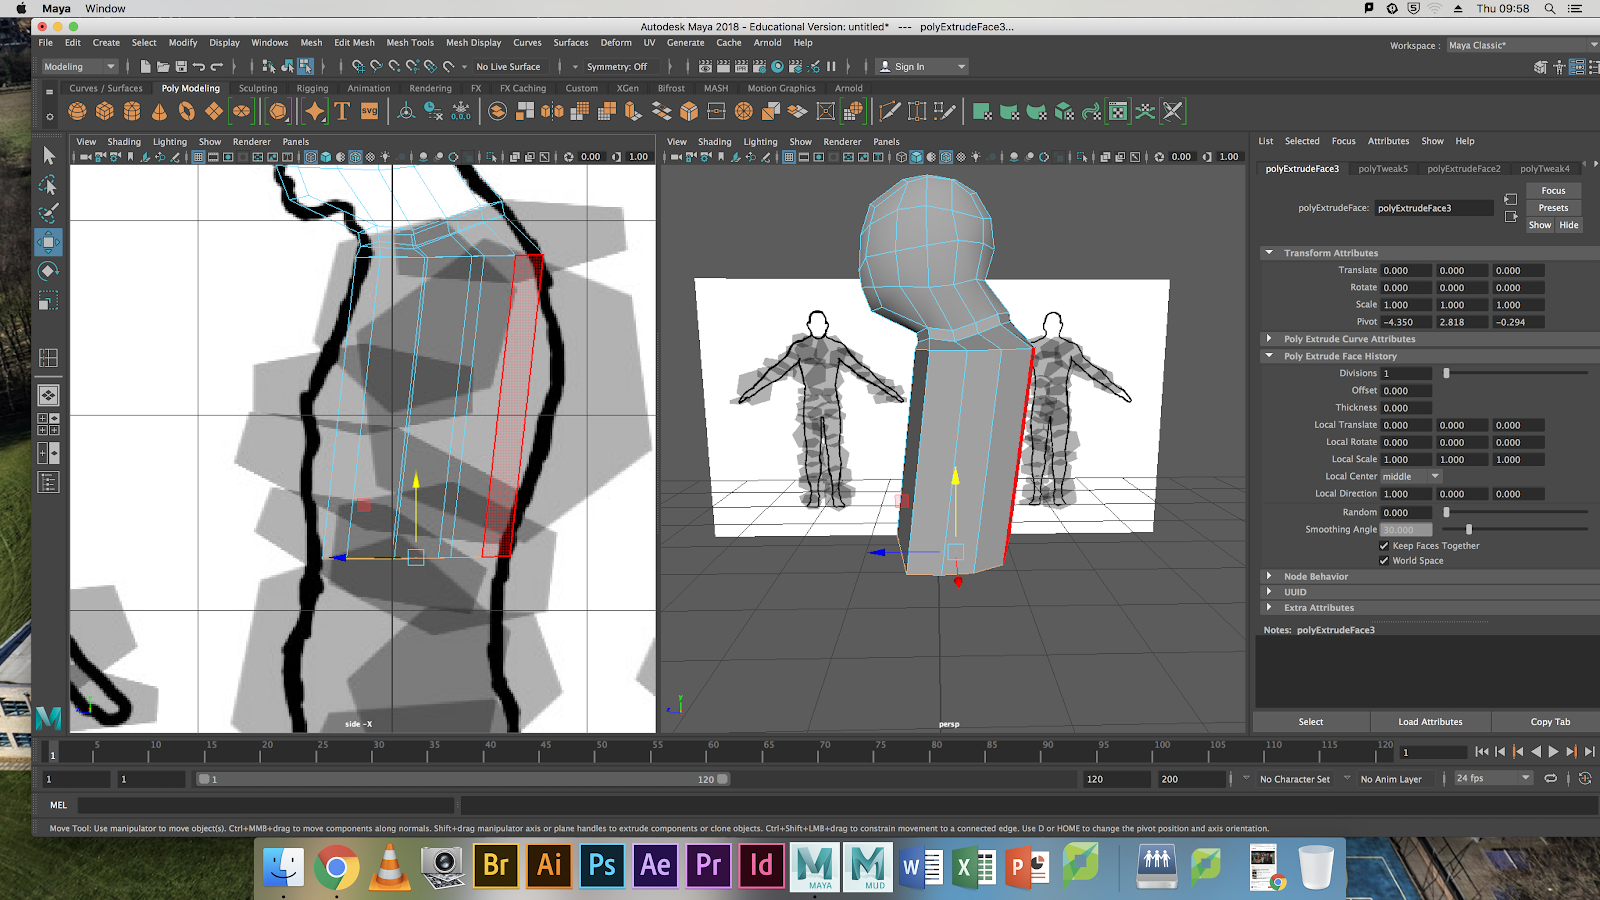
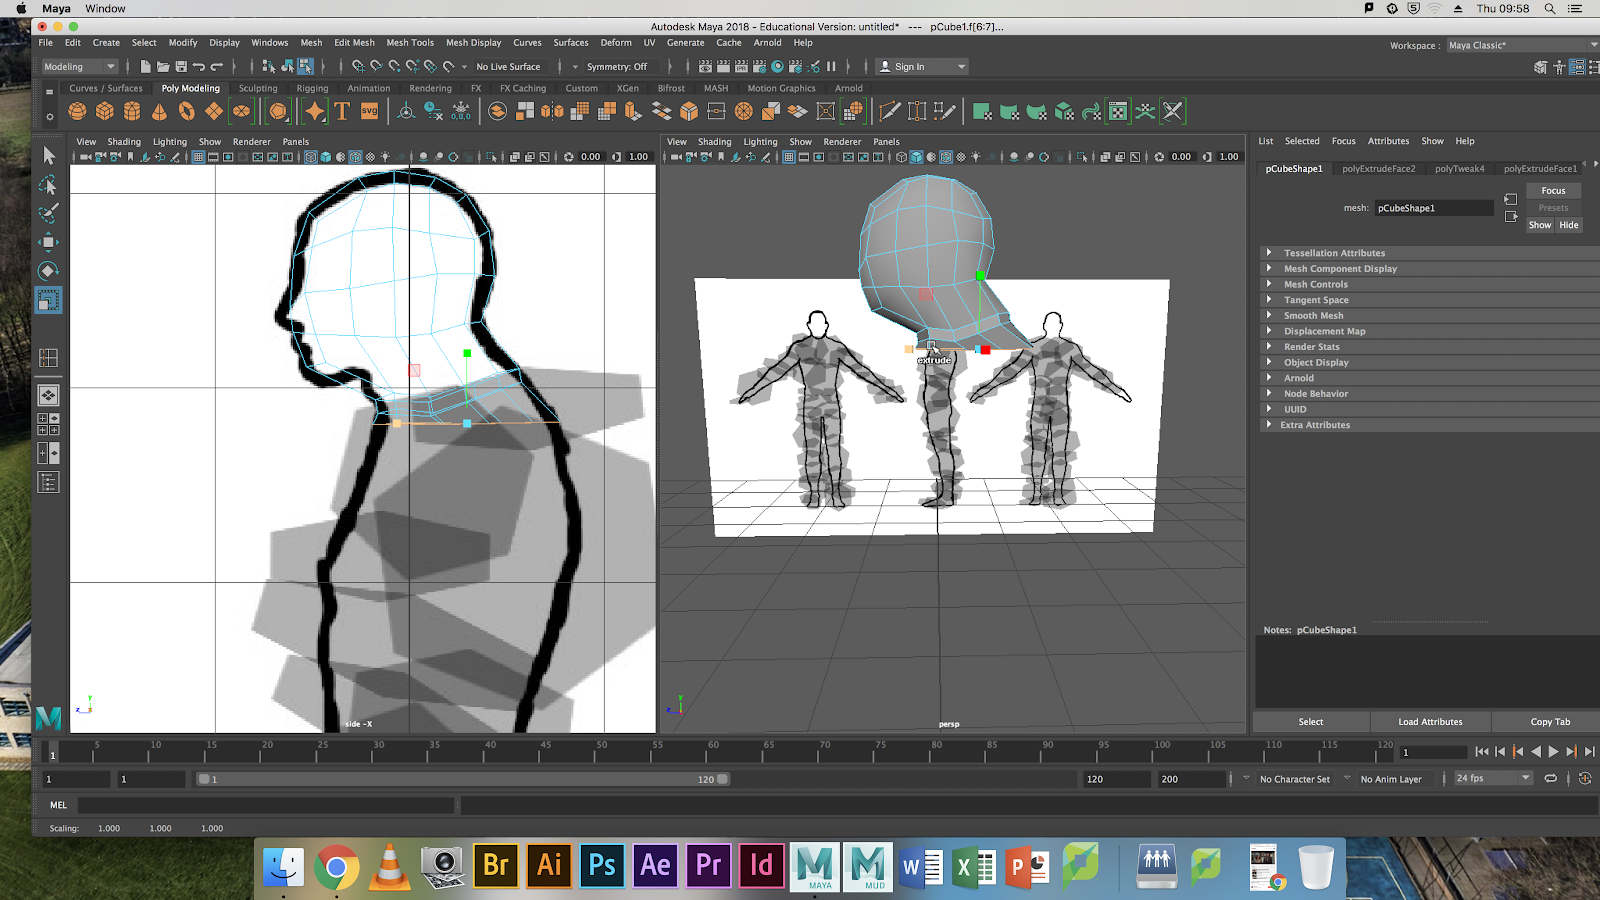
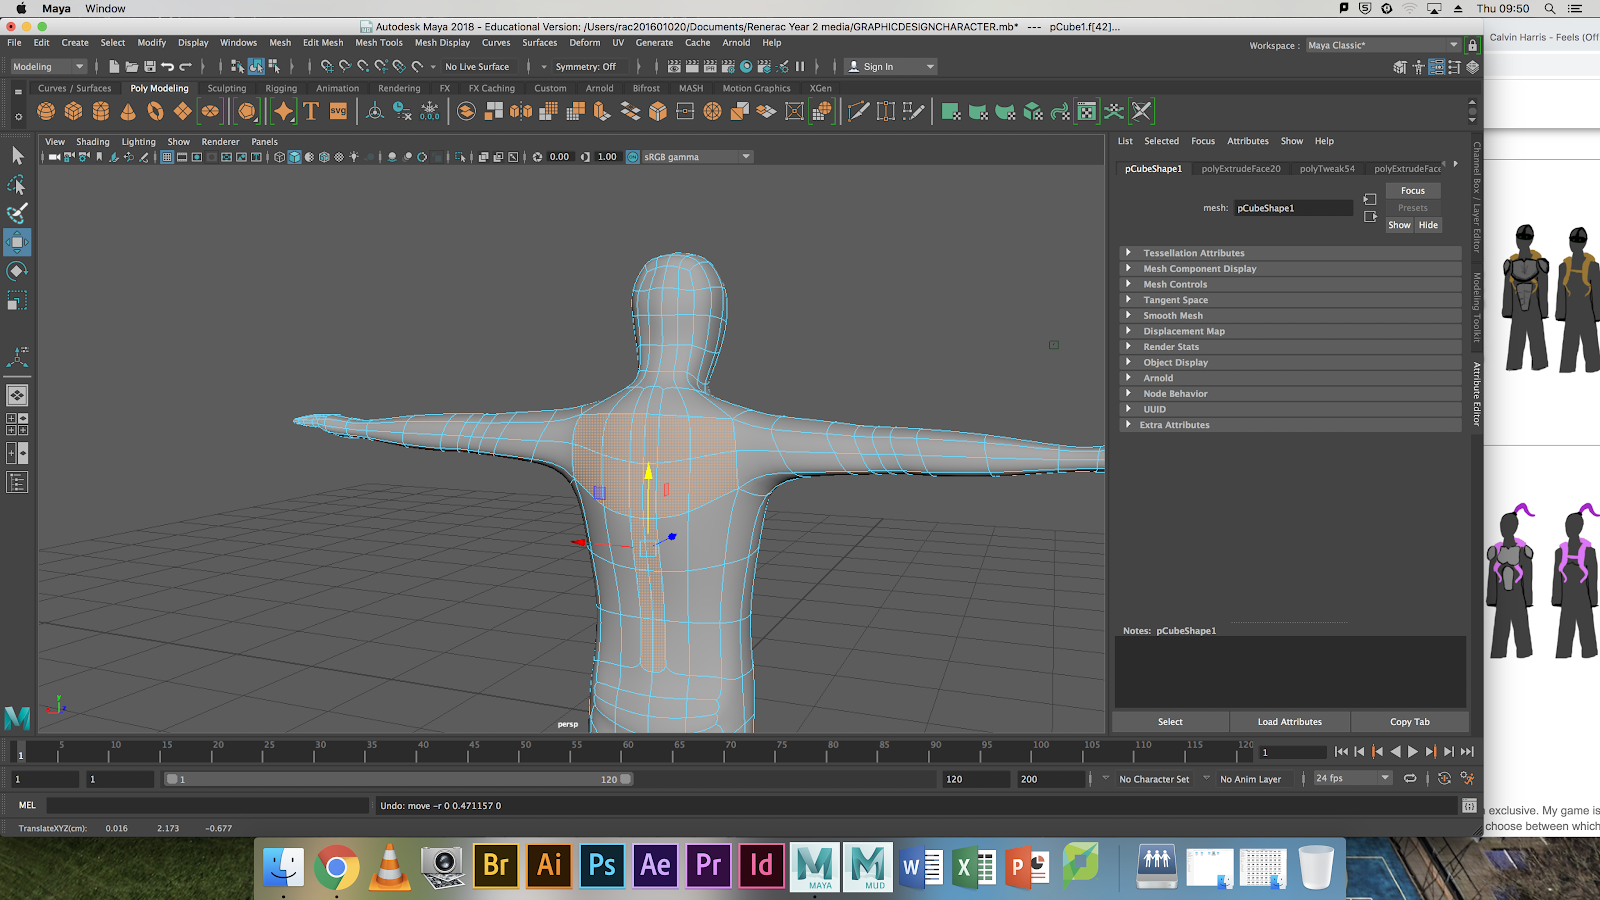
Step 5
Extrude the bottom faces by holding down the right mouse button and go in to face mode. Then hold down shift and left click the bottom faces and using the HOTKEY W and selecting the green arrow hold down shift and extrude the faces down to create a torso.
Step 6
Rotate the camera around to the other side of the character. Select the Inside faces by holding down right mouse button and hold down shift and selecting the faces and then pressing delete.
We do this because when we mirror the object the inside faces would be mirrored as well and this would make it harder to weight paint the character later.
Step 7
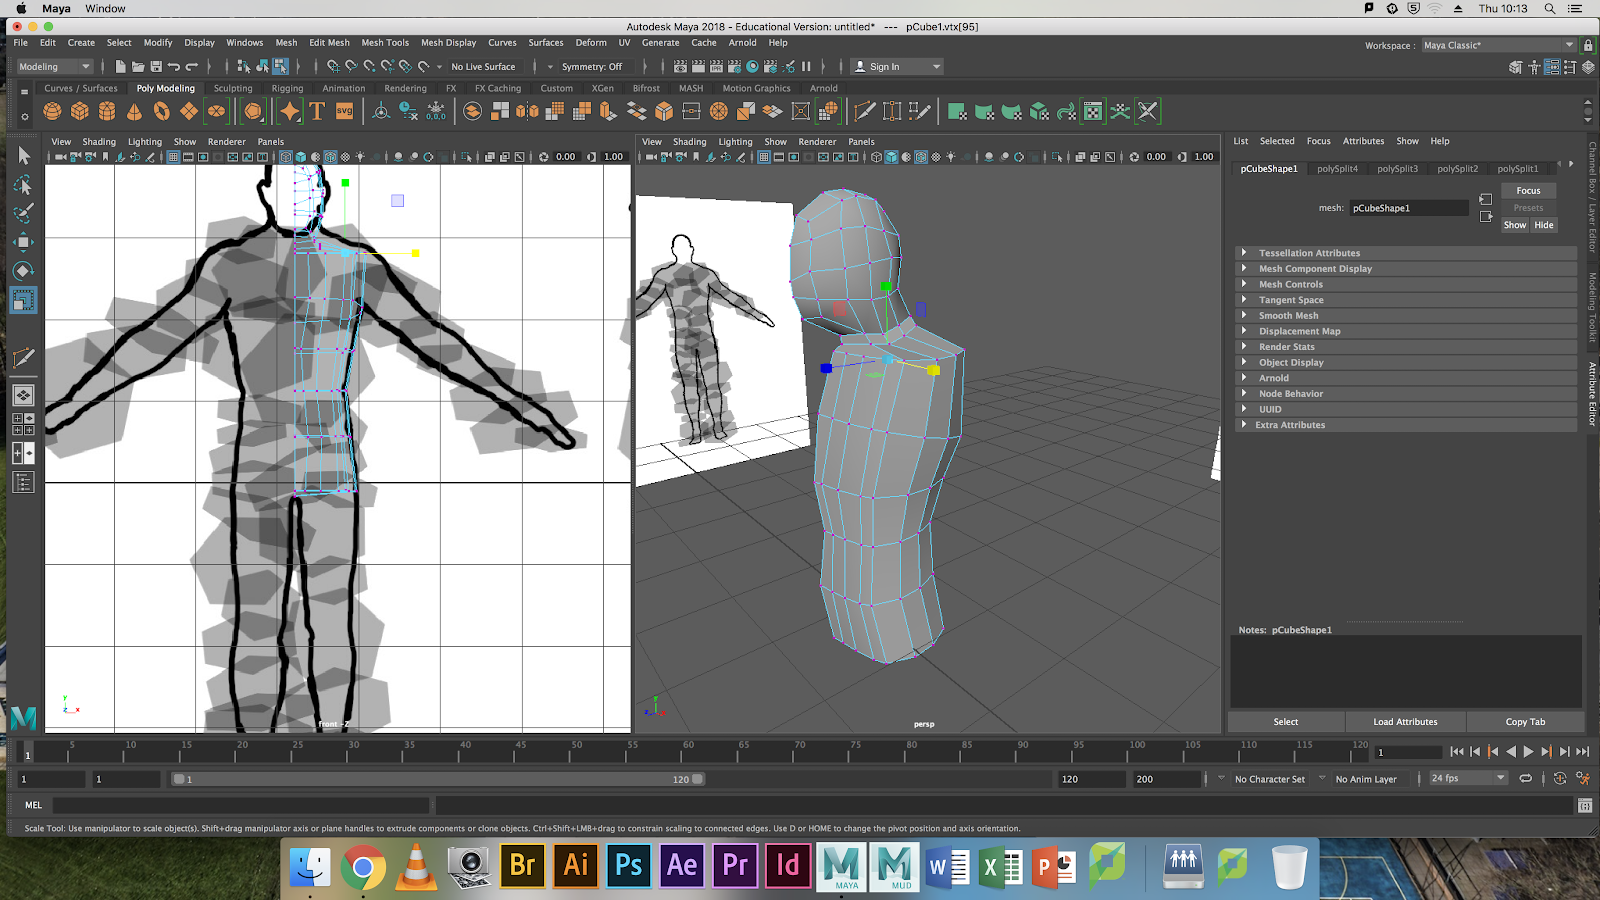
Add subdivisions to the primitive torso. To do this go the Toolbar>Edit Mesh>Subdivision Tool. When you have added these subdivisions go in to vertex mode by holding down the right mouse button and going on the vertex mode window. Select a few vertices and rearrange them so that the torso looks organic and humanoid.
Step 8
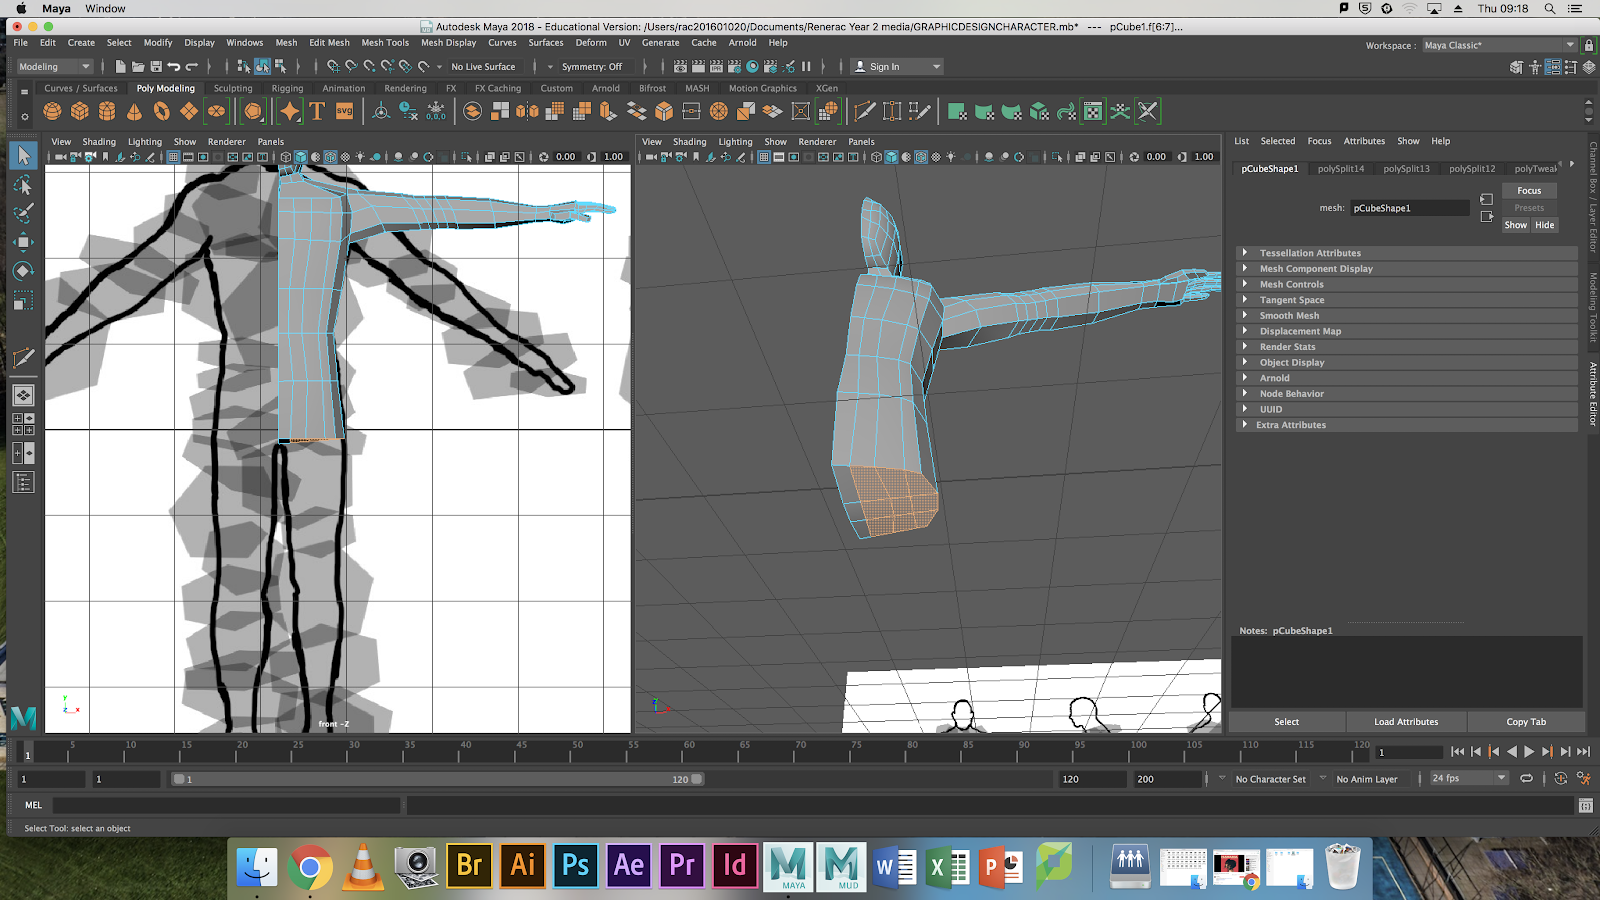
Select the upper few faces and extrude them. These will be the arms because we can then add more subdivisions to create the organic and humanoid arm.To extrude hold down shift and left click the bottom faces and using the HOTKEY W and selecting the green arrow hold down shift and extrude the faces out to create the primitive arm shape.
Step 9
Add edges to the end of the arm to create the fingers. Select the faces by left clicking on the face and hold down shift and left click the bottom faces and using the HOTKEY W and selecting the green arrow hold down shift and extrude the face, repeat this process to create 3 joints on each finger so that the character animates correctly.
TAKE HAND SCREEN SHOT
Step 10
Repeat this process for the thumb. Select the faces by left clicking on the face and hold down shift and left click the bottom faces and using the HOTKEY W and selecting the green arrow hold down shift and extrude the face, repeat this process to create 1 joint.
Step 11
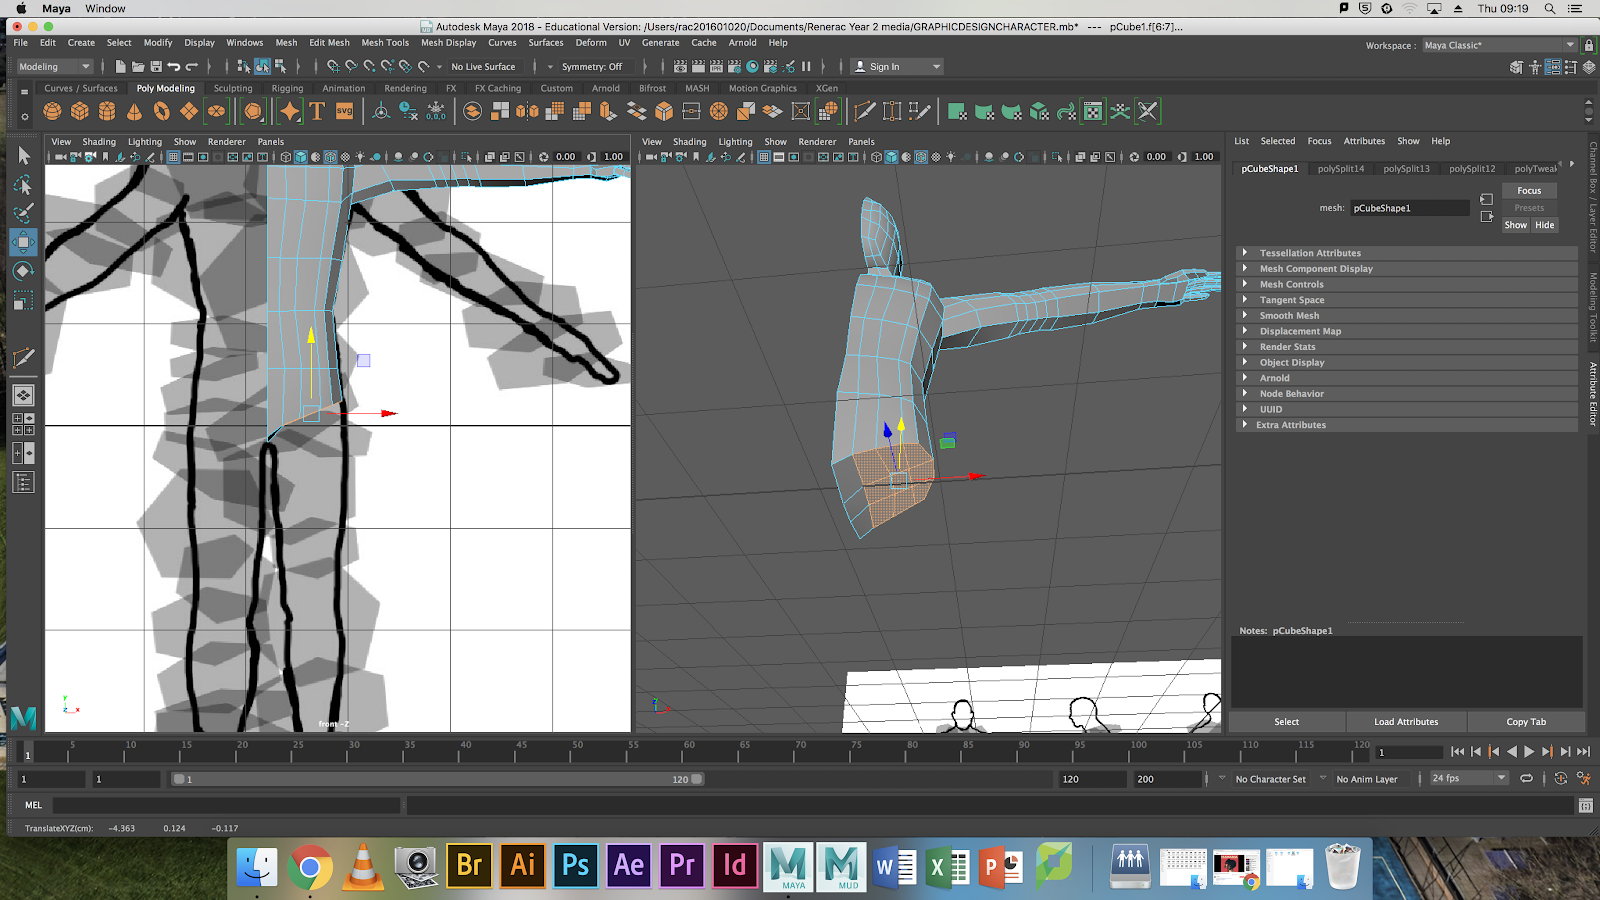
Select the bottom faces by holding down shift and left clicking the faces while in the face mode.We then need to drag these faces up by pressing the HOT KEY W and holding the green arrow by holding down the left mouse button and dragging these faces up to create a waist.
Step 12
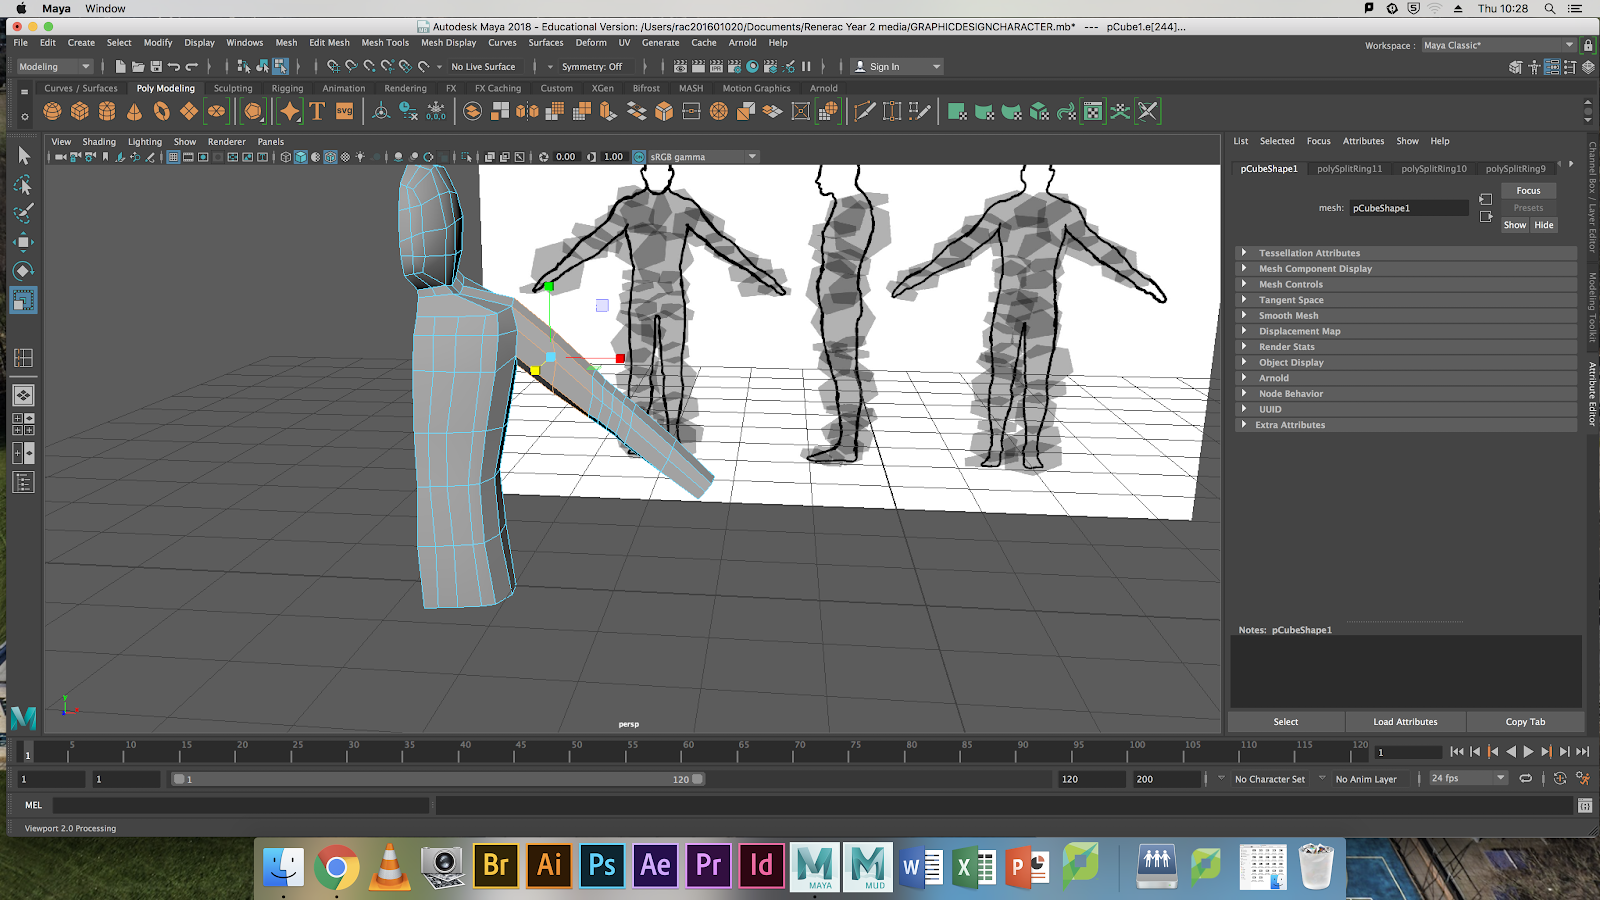
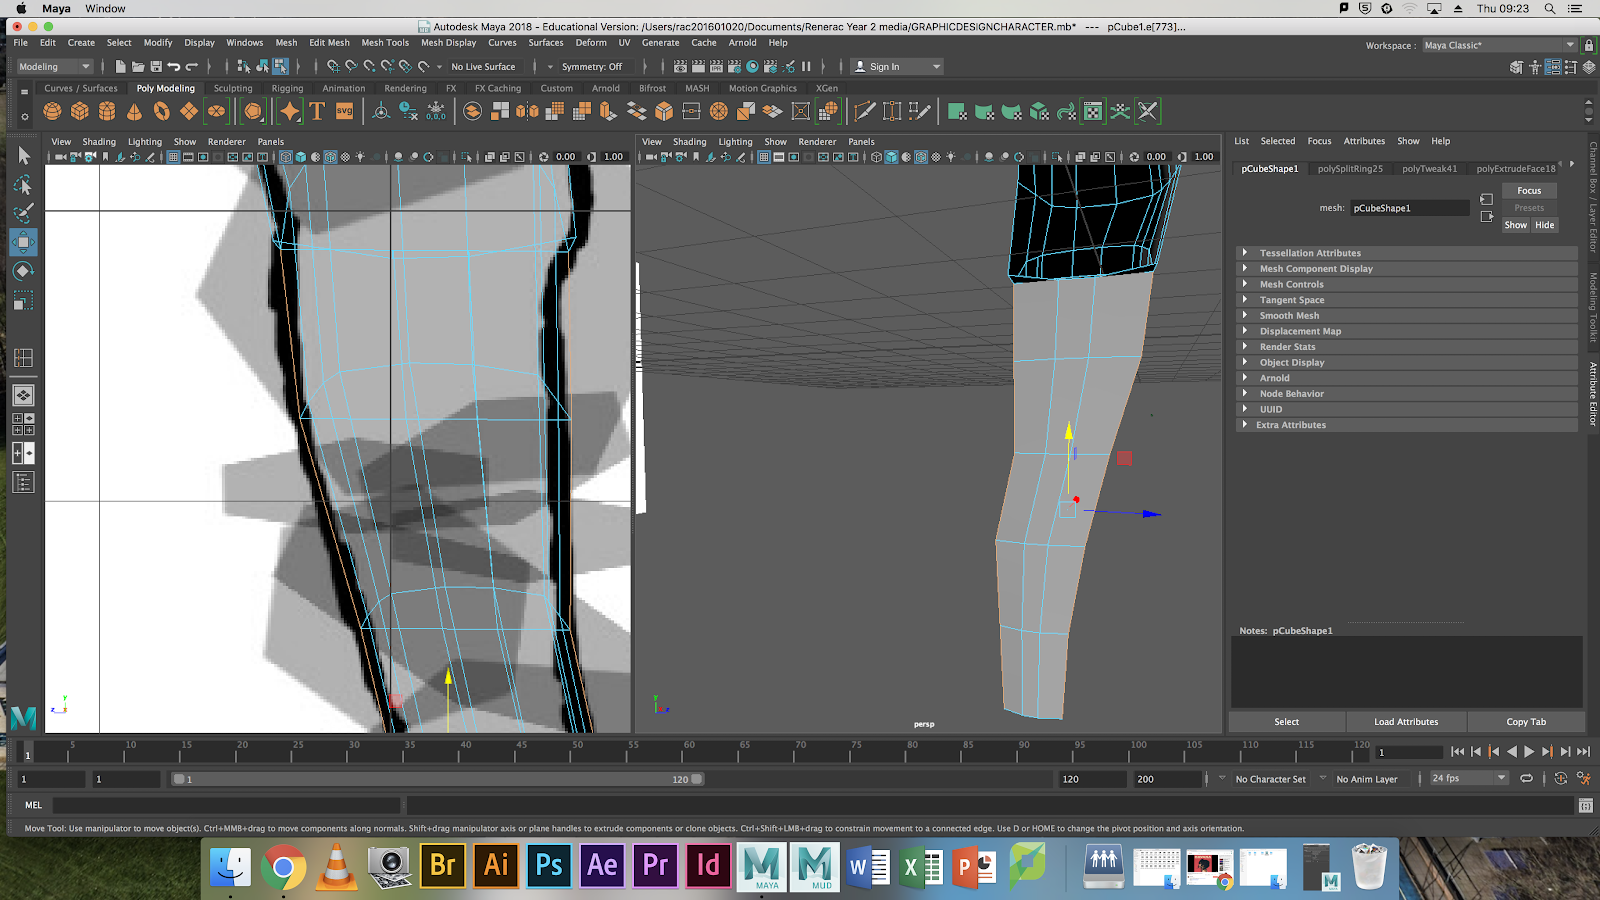
Extrude these selected faces by hold down shift and left click the bottom faces and using the HOTKEY W and selecting the green arrow hold down shift and extrude the faces, repeat this process to create 5 subdivisions to create a leg.

Step 13
Select and extrude the bottom faces of the leg to create the foot of the character to do this you
have to select the faces by left clicking on the face and hold down shift and left click the bottom faces and using the HOTKEY W and selecting the green arrow hold down shift and extrude the face.

Step 14
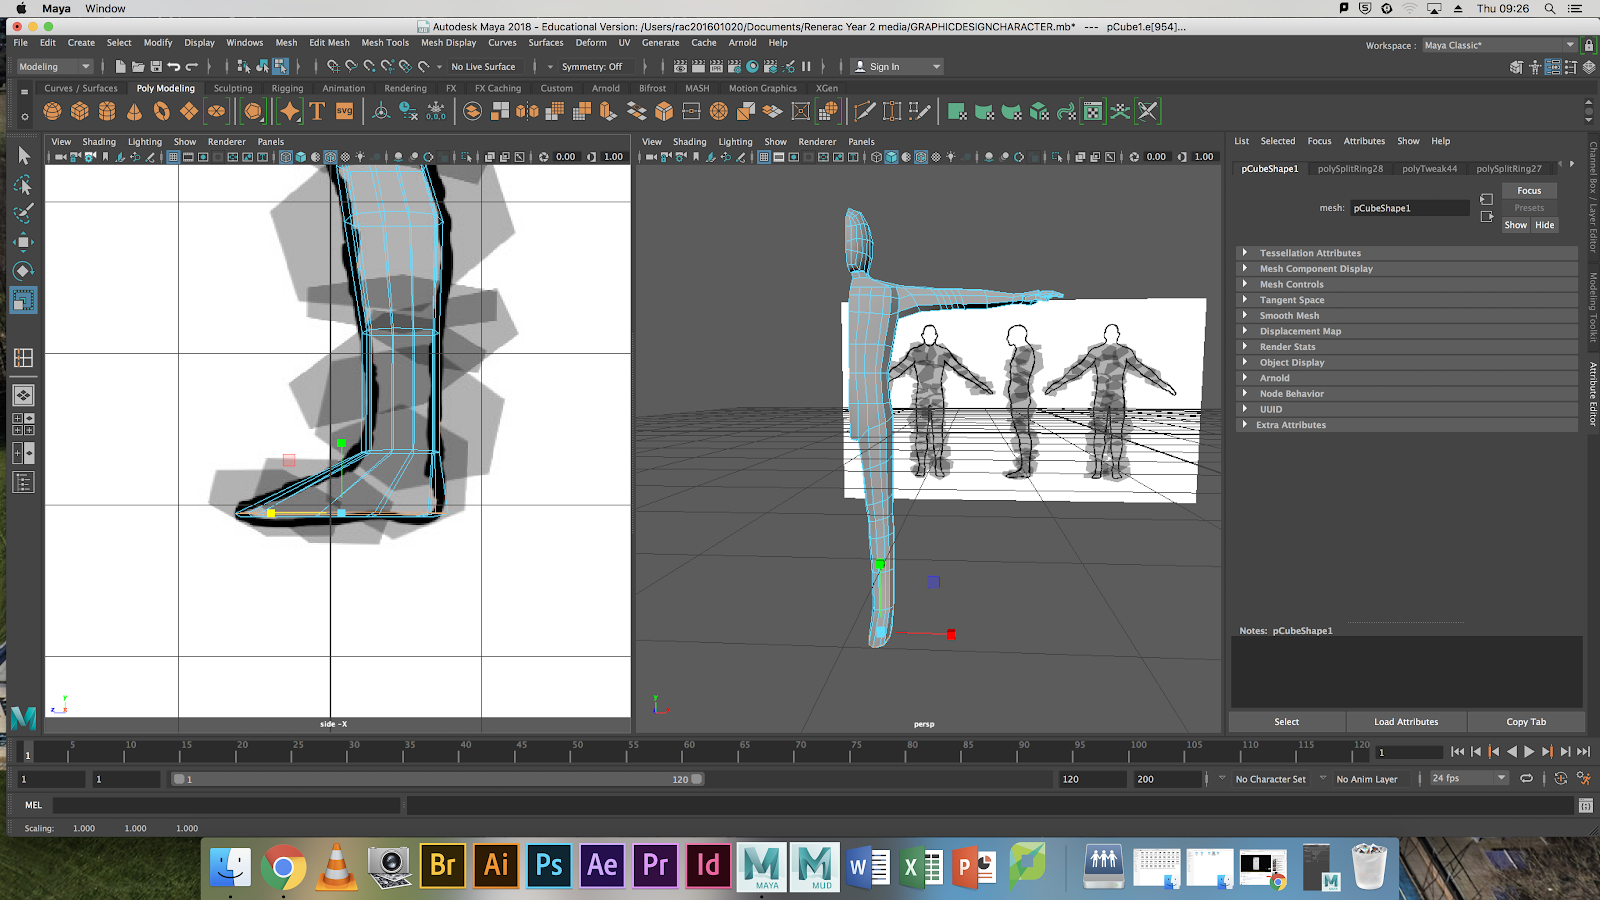
Insert an edge loop to the foot to create a more realistic foot. To insert a edge loop you have to go in to the toolbar>Mesh Tool>Insert edge loop. This will insert and edge loop which will make the foot look more natural and easier to model and animate later on.

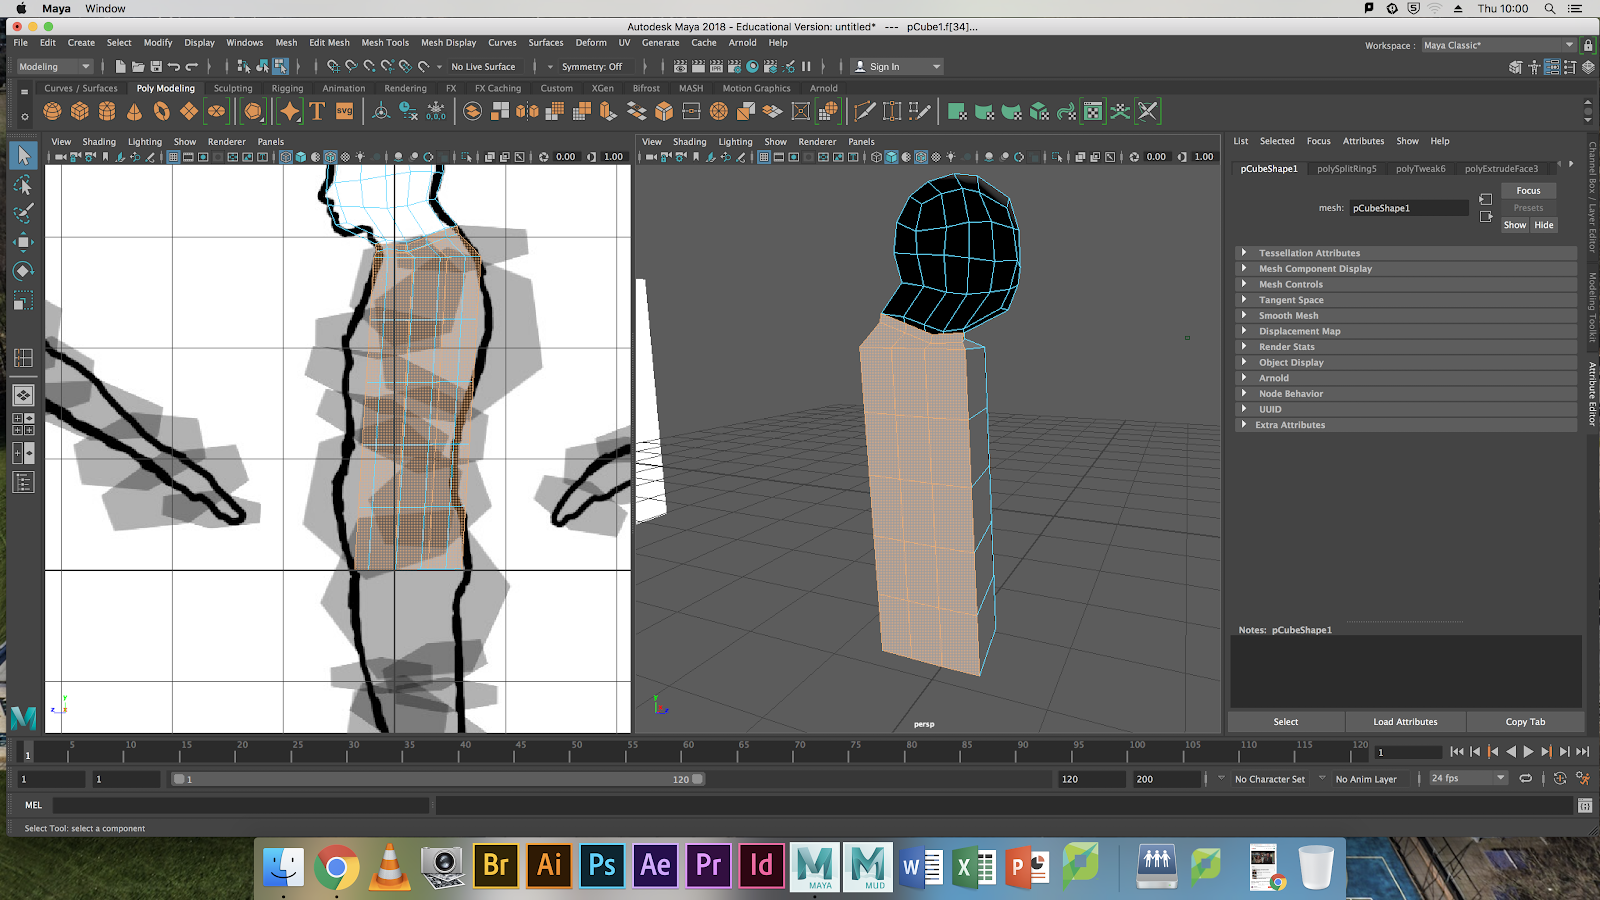
Step 15
Add subdivisions to the buttox to create it look like a butt. To add subdivisions go to mesh tools>Edge cut tool and draw in the edges to create more subdivisions which will define the body part and also the character will look more realistic.


Step 16
Select the finished half of the character and go in to the object mode by holding down the right mouse button and select the object mode. To mirror you have to go to the toolbar>Mesh Tools>Mirror. Press this button and you will have a base mesh character.
ARMOUR


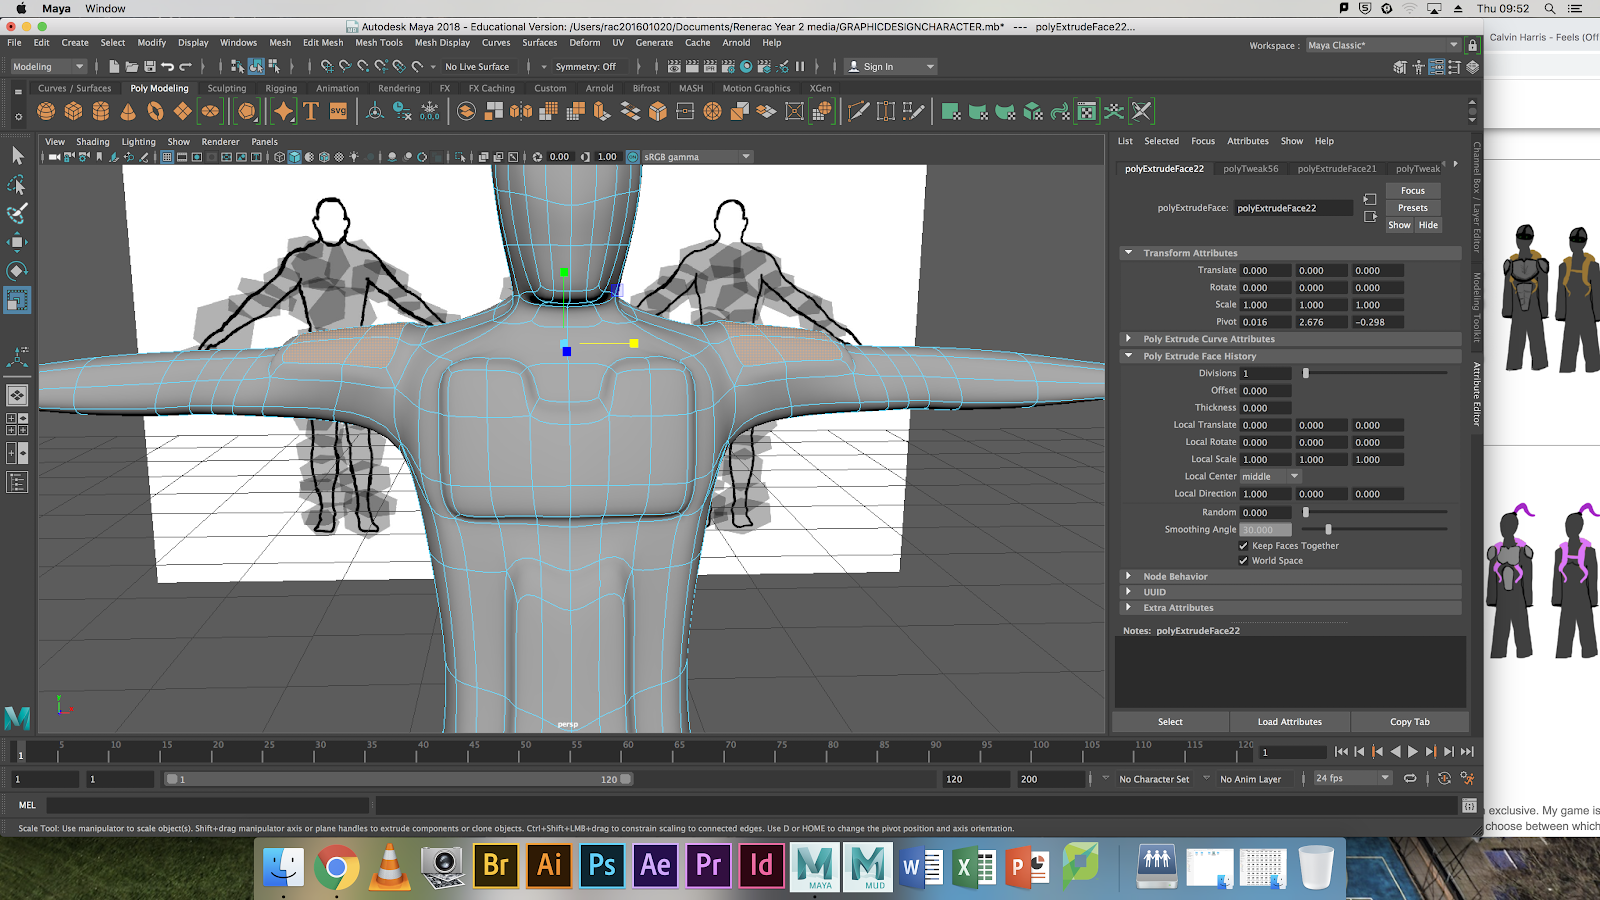
Step 1
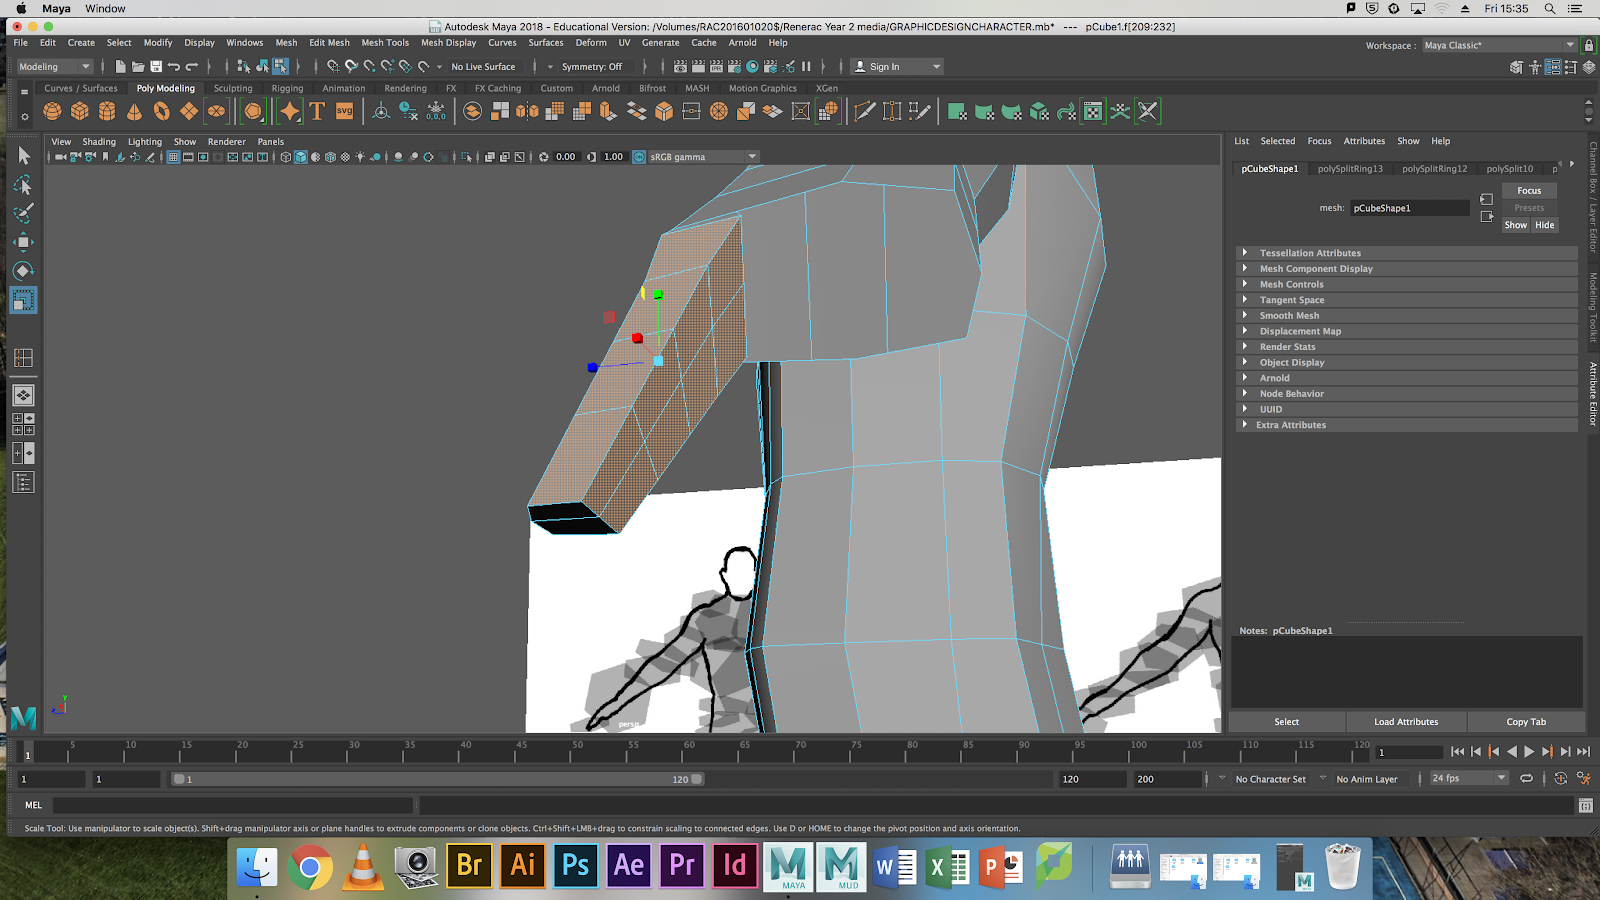
To extrude the faces which are going to be the armour start by holding down the right mouse button and go in to face mode. Then hold down shift and left click the faces and using the HOTKEY W and selecting the yellow arrow hold down shift and extrude the faces down to create the chest plate armor.

Step 2
To extrude the faces which are going to be the armour start by holding down the right mouse button and go in to face mode. Then hold down shift and left click the faces and using the HOTKEY W and selecting the yellow arrow hold down shift and extrude the faces down to create the back plate armor.
Step 3
To extrude the faces which are going to be the armor start by holding down the right mouse button and go in to face mode. Then hold down shift and left click the faces and using the HOTKEY W and selecting the green arrow hold down shift and extrude the faces down to create the shoulder plate armor.
NIGHT VISION GOGGLES

Step 1
Create a primitive cylinder by selecting the cylinder icon in the polygon toolbar. When this cylinder is created you then need to move it by using the HOTKEY W and drag the arrow up to the head area of the character and then move it to the eye area.
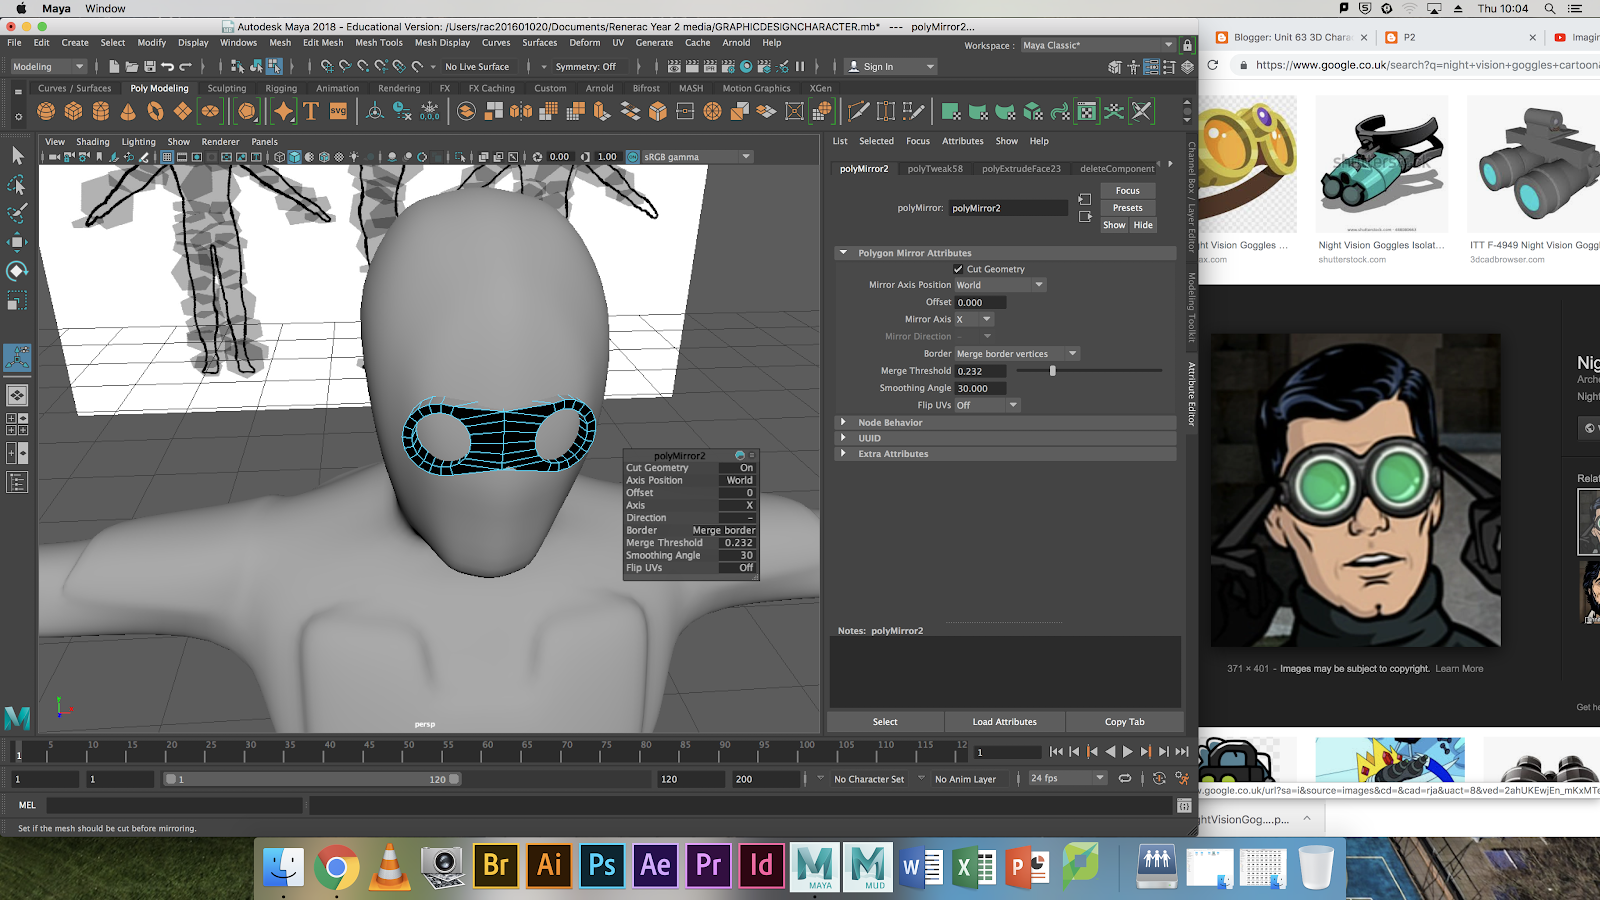

Step 2
To mirror you have to go to the toolbar>Mesh Tools>Mirror. Press this button and you will have a set of night vision goggles. We then need to change the light to see the front faces which can be done in the panel>view menu.


Step 3
Create a primitive cylinder by selecting the cylinder icon in the polygon toolbar. When this cylinder is created you then need to move it by using the HOTKEY W and drag the arrow up to the head area of the character and then move it to the eye area. We then press the HOTKEY R to change the thickness of the cylinder to create the eyes.


PROPS

Step 1
Create a primitive cube by selecting the cube icon in the polygon toolbar. When this cube is created you then need to move it by using the HOTKEY W in to the center of the bag photos.

Step 2
Subdivide the cube by using the subdivide mesh tool by going the Toolbar>Mesh Tools>Subdivision Tool. This adds more subdivisions and it creates a higher resolution of the bag.


Step 3
Select the Inside faces by holding down right mouse button and hold down shift and selecting the faces and then pressing delete. Then select the finished half of the bag and go in to the object mode by holding down the right mouse button and select the object mode. To mirror you have to go to the toolbar>Mesh Tools>Mirror. Press this button and you will have a backpack.


Step 4
Create a primitive cylinder by selecting the cylinder icon in the polygon toolbar. When this cylinder is created you then need to move it by using the HOTKEY W and drag the arrow up to the neck area to create the backpack strap. Select and extrude faces by holding down the right mouse button and go in to face mode. Then hold down shift and left click the faces and using the HOTKEY W to move and the HOTKEY E to rotate the faces you create a curved cylinder mesh for the straps of the back pack.You then need to mirror the strap by going to the toolbar>Mesh Tools>Mirror. Press this button and you will have a identical backpack strap.


Step 5
Create a primitive cylinder by selecting the cylinder icon in the polygon toolbar.Subdivide the cylinder by using the subdivide mesh tool by going the Toolbar>Mesh Tools>Subdivision Tool.Change the size of the edge loop when it has been added by using the HOTKEY R and dragging down the middle cube to change the size radius.
Step 3


Step 6
TAKE SCREENSHOT
Step 7


Step 10

Step 11


Step 14


Step 18
Step 19


Step 1

Step 2


Step 4


Step 6

Step 7
Step 8

Step 9
Step 10
Step 12

Step 13
Step 14
We are now going to create Nurb for the Right Arm/elbow/wrist Joint .
To do this go in to TOOLBAR>CREATE>NURB PRIMITIVE>CIRCLE
repeat this process 3x . Now we have to move the nurb into its right position.
To do this use the W key to move the created nurb circle up to the Arm/elbow/wrist
joint, the NURBs are too small/large so use the R key to change the size of the
circle. Now rename the NURB circle in the Outliner window to R_Arm_CTRL.
R_Elbow_CTRL.R_Wrist_CTRL.
Step 16


To create our walk cycle we have to first have to use our Nurb circles to create a pose. This pose will be the start of a walk cycle.To set the pose we have to have the leg NURB circle selected and press the HOTKEY S which will set a keyframe. Do this for all of the appendages so that the animation is fluent and well organised. If you forget to do this then your animation will not look correctly. Now move along the timeline and go forward a few frames and create your next pose. Do not move your time line until you have set the key frames because the unset keyframes will result in no animation. Redo this process until you have create a full walking animation. If you wish to make this animation last longer hold down shift on the timeline and select your key frames and RIGHT CLICK > COPY and then move up your time line a few frames and RIGHT CLICK> PAST. this pastes your animation and you can do this for how long you need to.


Step1
To create lights you have to know which rendering software we are using. In this project we are using the Arnold Rendering software therefore we are going to use the Arnold lights. To access these lights select the Arnold tab and import a global light and a spot light in the toolbar.
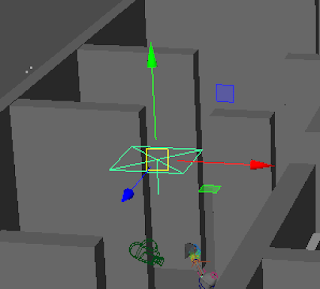
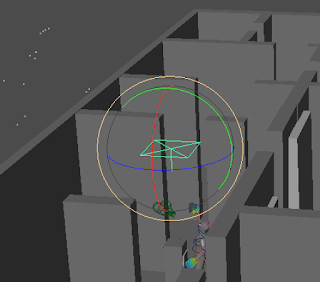
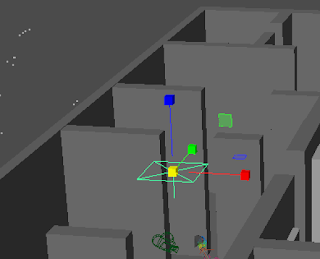
Step 2
To move your lights use the W HOTKEY, to rotate your lights use the HOTKEY E and to change the size of your lights use the R HOTKEY. When you have placed your lights in to position we now need to change their properties to set the right mood.
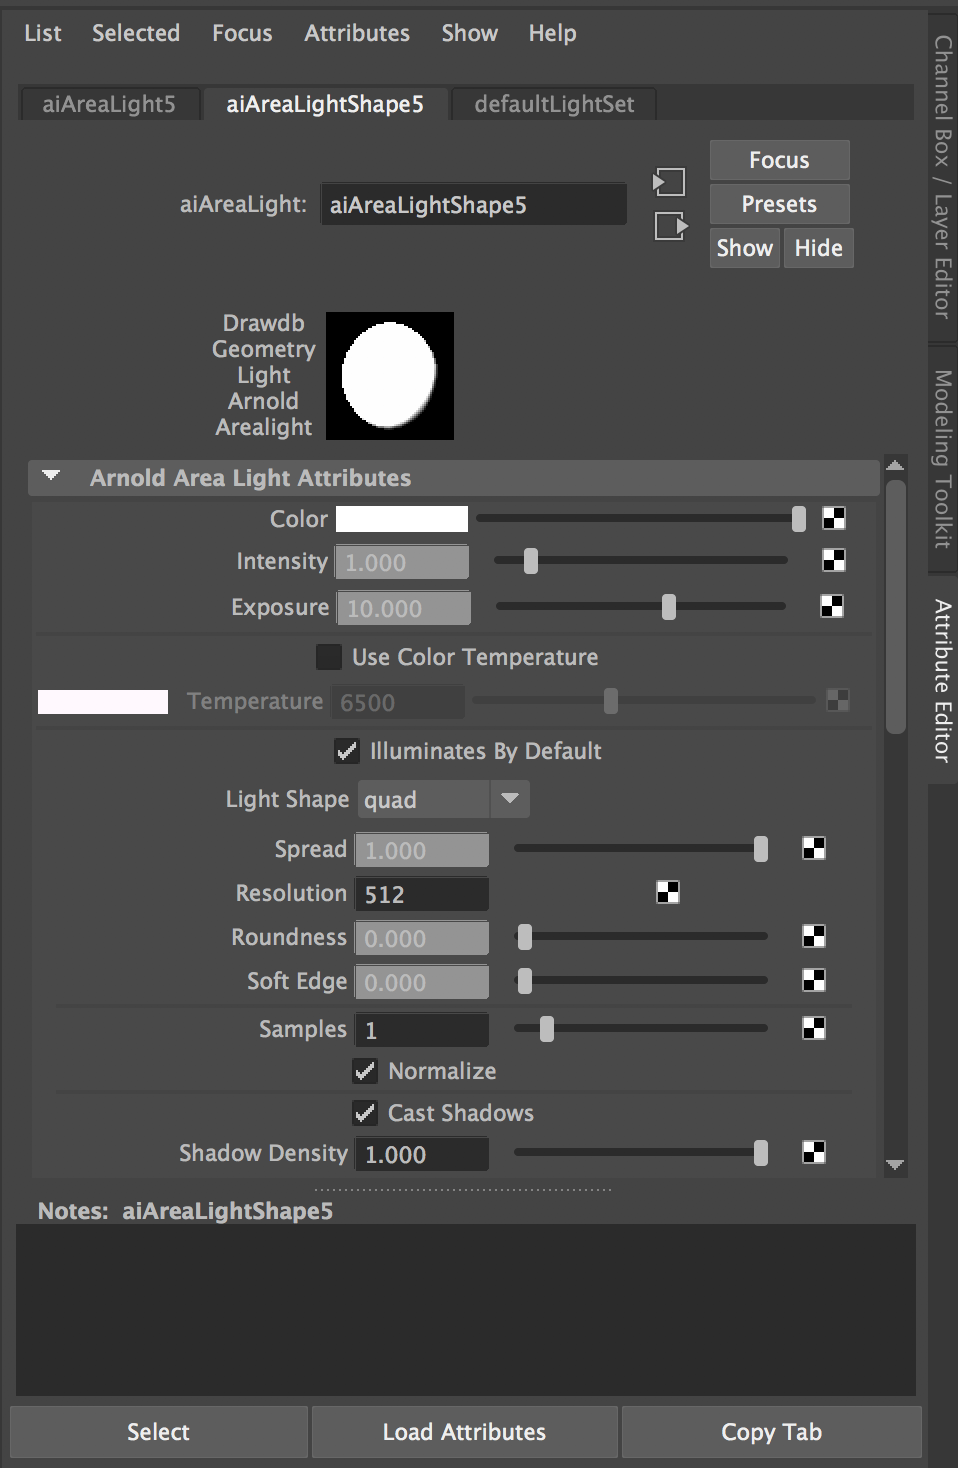
Step 3
Select one of your lights and go in to the ATTRIBUTES panel. change the intensity to 10 of your spot light. You can also change the intensity to what you will need
Step 4
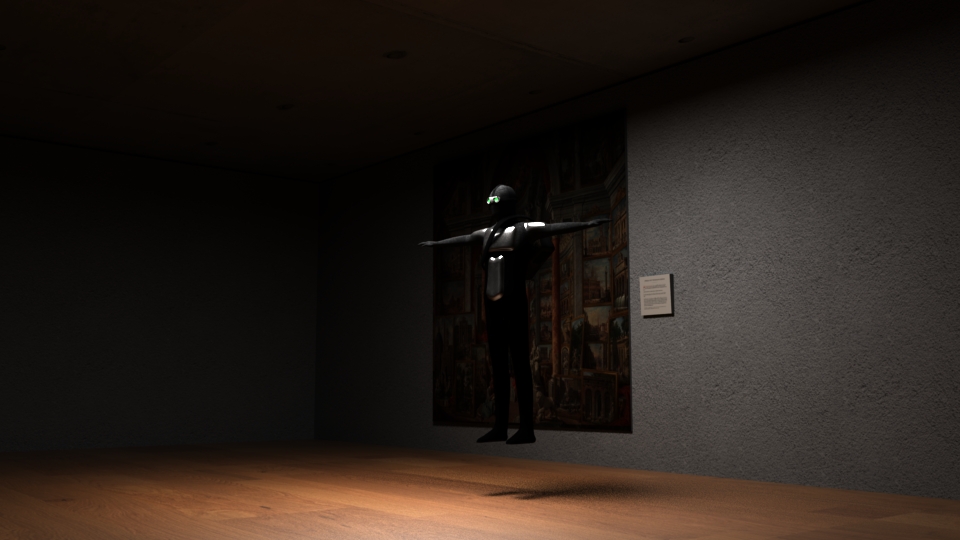
Now that we have created our lights our project should look something like this. This will change depending on your scene, theme and size of your project.
Skeleton
Step 1
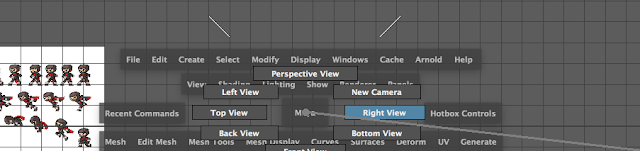
Go in to the side view of our scene. To do this press and hold down the SPACE BAR
and then RIGHT CLICK the mouse button. A Maya icon should appear in the centre
as seen in the image above ,now drag the move over the Right View and click on the
button. This will change your perspective in to side view.
and then RIGHT CLICK the mouse button. A Maya icon should appear in the centre
as seen in the image above ,now drag the move over the Right View and click on the
button. This will change your perspective in to side view.
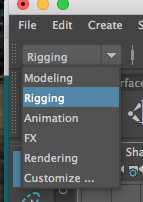
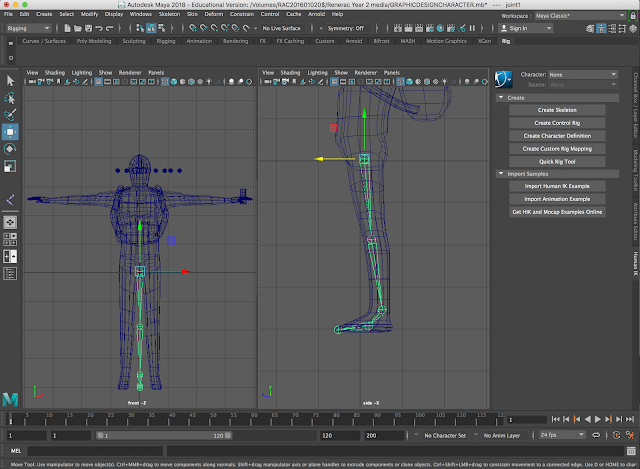
Step 2
Now we need to change our tool set and our maya layout to rigging to do this go to
the Menu Mode Tab and change your menu set in to the Rigging menu set. This
will enable us to properly rig our character.
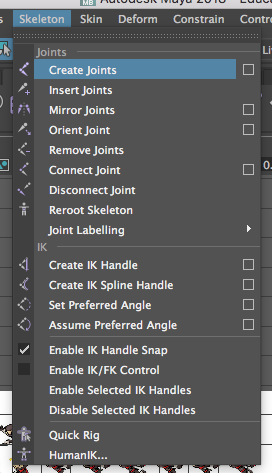
Snow to create a skeleton go to the SKELETON MENU>JOINT TOOL and then
click on the rectangle box. This will open the tool settings menu.
the Menu Mode Tab and change your menu set in to the Rigging menu set. This
will enable us to properly rig our character.
Snow to create a skeleton go to the SKELETON MENU>JOINT TOOL and then
click on the rectangle box. This will open the tool settings menu.
Step 3
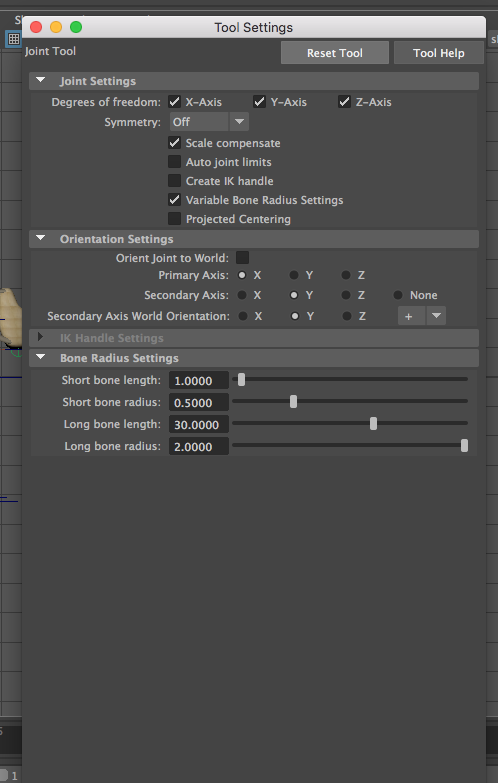
Now we have to create our skeleton to do this, in the toolbar go in to the
SKELETON MENU>JOINT TOOL but then click on the box to open the
tool menu. With the menu open reset the tool by pressing the RESET TOOL button.
SKELETON MENU>JOINT TOOL but then click on the box to open the
tool menu. With the menu open reset the tool by pressing the RESET TOOL button.
Step 4
Now select the JOINT TOOL and start drawing the bones in the hip area.
To do this click in the hip area and then in the knee area and then in the
ankle foot and toe are and then press ENTER which creates our joints.
To do this click in the hip area and then in the knee area and then in the
ankle foot and toe are and then press ENTER which creates our joints.

Step 5
Now that our bones are created we need to rename them so that everything is
in order and won't get lost or deleted by accident.To do this we need to go
in to the OUTLINER window. To open up this window we need to go in to
the WINDOWS>OUTLINER this opens the Outliner window.
in order and won't get lost or deleted by accident.To do this we need to go
in to the OUTLINER window. To open up this window we need to go in to
the WINDOWS>OUTLINER this opens the Outliner window.

Step 6
Now enter the Outliner window and rename the joints from
Joint_1,Joint_2,Joint_3,Joint_4,Joint_5, in to the following
sequence as L_ Thigh_joint, L_Knee_joint, L_Heel_joint,
L_Toe_joint and L_ToeTip_joint. This will also help us with mirroring the joints.
Joint_1,Joint_2,Joint_3,Joint_4,Joint_5, in to the following
sequence as L_ Thigh_joint, L_Knee_joint, L_Heel_joint,
L_Toe_joint and L_ToeTip_joint. This will also help us with mirroring the joints.
TAKE SCREENSHOT
Step 7
After renaming these joints we now have to move in to the
front view, to do this hold down the SPACEBAR and
RIGHT CLICK on the Maya icon and drag onto Front
View as done in step 1. This will change our perspective in
to the front view perspective.
front view, to do this hold down the SPACEBAR and
RIGHT CLICK on the Maya icon and drag onto Front
View as done in step 1. This will change our perspective in
to the front view perspective.

Step 8
Now that we are in the front view we will move our leg joints
in to the left leg of the character. To do this while you have the
joints selected.Hold down W key and using the arrows move your
joints in to the left leg of the character.
in to the left leg of the character. To do this while you have the
joints selected.Hold down W key and using the arrows move your
joints in to the left leg of the character.


Step 9
Now we are going to mirror our joints. Select our leg joints and
then go in to the SKELETON>MIRROR JOINTS and go in to
the tool settings by clicking on the box beside MIRROR JOINTS.
In the Search FOR type in L_ and in the REPLACE WITH type R_.
This changes the joints names in the OUTLINER which cuts
down time on renaming our mirrored joints.
then go in to the SKELETON>MIRROR JOINTS and go in to
the tool settings by clicking on the box beside MIRROR JOINTS.
In the Search FOR type in L_ and in the REPLACE WITH type R_.
This changes the joints names in the OUTLINER which cuts
down time on renaming our mirrored joints.

Step 10
Now we have to make sure that our joints are oriented correctly.
To orient our joints first select our joints and then go in to
SKELETON>ORIENT menu settings and select on world and apply.
To orient our joints first select our joints and then go in to
SKELETON>ORIENT menu settings and select on world and apply.

Step 11
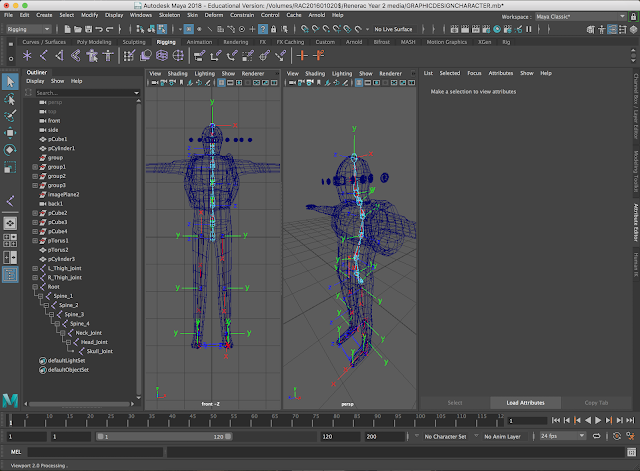
Now we have to create the spine,neck and head joints to
move our characters torso and head. Go into SKELETON MENU>JOINT TOOL
and draw the bones from the tailbone and all the way up to the top of the head
as show in the images above.
move our characters torso and head. Go into SKELETON MENU>JOINT TOOL
and draw the bones from the tailbone and all the way up to the top of the head
as show in the images above.

Step 12
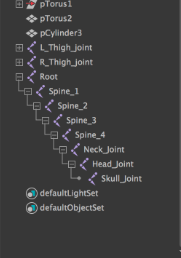
Now enter the Outliner window again and rename the joints from
Joint_1,Joint_2,Joint_3,Joint_4,Joint_5,Joint_6,Joint_7,Joint_8 in to
the following sequence as Root,Spine_1,Spine_2,Spine_3,Spine_4,
Neck_Joint, Head_Joint, Skull_Joint.
Joint_1,Joint_2,Joint_3,Joint_4,Joint_5,Joint_6,Joint_7,Joint_8 in to
the following sequence as Root,Spine_1,Spine_2,Spine_3,Spine_4,
Neck_Joint, Head_Joint, Skull_Joint.

Step 13
Now we have to orient our spinal joints to do this select the joins
by holding down shift and left clicking the joints and then go in to
SKELETON>ORIENT menu settings and select on world and apply.
Go in to the top view by holding down the SPACEBAR and then
RIGHT CLICK the mouse button. A Maya icon should appear in the
centre as seen in the image above , now drag the mouse over the Top
View button and click the left mouse button.


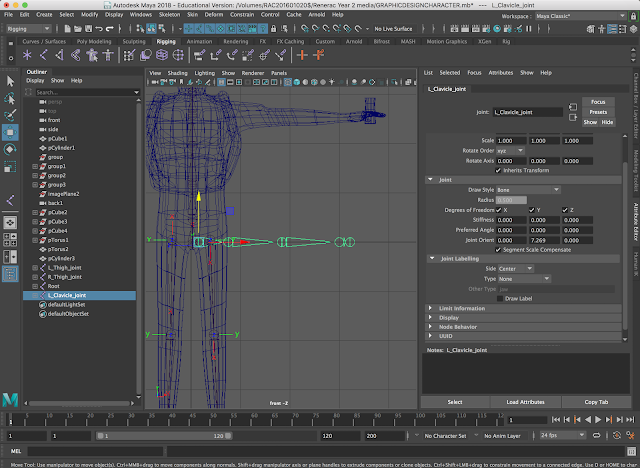
Step 14
We now have to create the arm joints. To do this go in to the
SKELETON MENU>JOINT TOOL and draw the joints starting
with the clavicle joint which is located where the collar bone would
be and then we have these joints created rename them in to :
L_Clav, L_Arm_Joint,L_ Elbow_Joint,L_Wrist_Joint,
L_Han d_Joint in the Outliner window.
SKELETON MENU>JOINT TOOL and draw the joints starting
with the clavicle joint which is located where the collar bone would
be and then we have these joints created rename them in to :
L_Clav, L_Arm_Joint,L_ Elbow_Joint,L_Wrist_Joint,
L_Han d_Joint in the Outliner window.


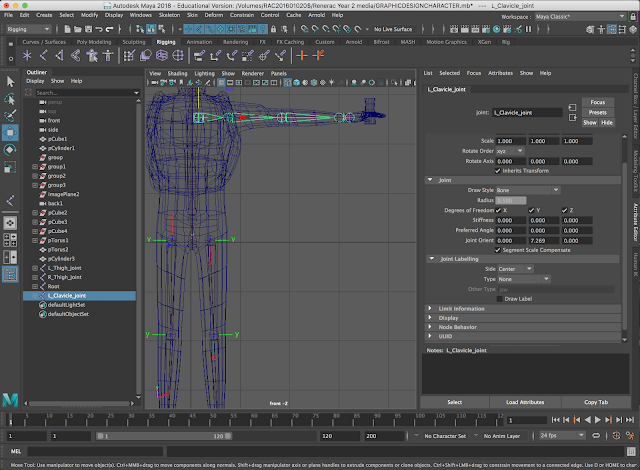
Step 15
Go in to the front view by holding down the SPACEBAR and then RIGHT
CLICK the mouse button. A Maya icon should appear in the centre as seen in
the image above , now drag the mouse over the Front View button and click
the left mouse button. Now select all of your arm joints by holding down shift
and the using the W key move your left arm in to the characters left arm.


Step 16
Now we are going to create our hand joints To do this go in to the top view
by holding down the SPACEBAR and then RIGHT CLICK the mouse button.
A Maya icon should appear in the centre as seen in the image above , now drag
the mouse over the Top View button and click the left mouse button. Now go
in to the SKELETON MENU>JOINT TOOL and start drawing each finger at
a time so first create your thumb and index,middle,ring and then your little finger.
TAKE SCREEN SHOT OF FINGER HIERACHY
Step 17
Step 17
Now enter the Outliner window and rename your finger joints so that they
are in this sequence:
are in this sequence:
L_Thumb_Joint_1,L_Thumb_Joint_2,L_Thumb_Joint_3.
Your Index joints should be renamed in to:
L_Index_Joint_1,L_Index_Joint_2,L_Index_Joint_3,
Your Middle finger joint should be named :
L_Middle_Joint_1,L_Middle_Joint_2,L_Middle_Joint_3
Your Ring finger should be renamed in to:
L_Ring_Joint_1,L_Ring_Joint_2,L_Ring_Joint_3
Your little finger joints should be renamed into:
L_Little_Joint_1,L_Little_Joint_2,L_Little_Joint_3


Step 18
Go in to the front view by holding down the SPACEBAR and then RIGHT CLICK
the mouse button. A Maya icon should appear in the centre as seen in the image above ,
now drag the mouse over the Front View button and click the left mouse button.
Now select all of your finger joints by holding down shift and then using the W
key move your left fingers in to the characters left hand.
Step 19
Select the Left arm joint and the finger joints and press Command J
to join these bones and then go in to SKELETON>MIRROR JOINTS
and go in to the tool settings by clicking on the box beside MIRROR JOINTS.
In the Search FOR type in L_ and in the REPLACE WITH type R_.
to join these bones and then go in to SKELETON>MIRROR JOINTS
and go in to the tool settings by clicking on the box beside MIRROR JOINTS.
In the Search FOR type in L_ and in the REPLACE WITH type R_.

Step 20
We now have to reorient our Arms. To do this go in to SKELETON>ORIENT
menu settings and select on world and apply. This orients our joints so that we
can animate them with ease.
menu settings and select on world and apply. This orients our joints so that we
can animate them with ease.


Step 21
Now we will join the whole skeleton together to make it a full character skeleton.
To do this hold down Shift and left click the left and right leg and then the spine
and then the left and right arm and press COMMAND J this joints our Bones
and creates a full body armature/skeleton.
To do this hold down Shift and left click the left and right leg and then the spine
and then the left and right arm and press COMMAND J this joints our Bones
and creates a full body armature/skeleton.
TAKE SCREENSHOT
Step 22
Step 22
For our last step we need to join the skeleton with the 3d character.
To do this first left click on the character and then while holding down
shift select the root bone of the character and go SKIN this merges
our bones with the 3D character.
To do this first left click on the character and then while holding down
shift select the root bone of the character and go SKIN this merges
our bones with the 3D character.
IK handles


Step 1
Now select the top of the left leg bone and then while holding down shift
select the ankle joint while you have these selected go in to the
SKELETON>CREATE IK HANDLE.Make sure that the leg bones
are bent out a little otherwise the IK Handle wont work.
select the ankle joint while you have these selected go in to the
SKELETON>CREATE IK HANDLE.Make sure that the leg bones
are bent out a little otherwise the IK Handle wont work.
Take screen shot(inverse the two above)
Step 2
Step 2
Now select the top of the Right leg bone and then while holding down
shift select the ankle joint while you have these selected go in to the
SKELETON>CREATE IK HANDLE. Make sure that the leg bones
are bent out a little otherwise the IK Handle wont work.
shift select the ankle joint while you have these selected go in to the
SKELETON>CREATE IK HANDLE. Make sure that the leg bones
are bent out a little otherwise the IK Handle wont work.

Step 3
Now select the left arm joint bone and then while holding down shift
select the wrist joint while you have these selected go in to the
SKELETON>CREATE IK HANDLE. This creates an Ik handle
in our arm. Make sure that the arm bones are bent in a little otherwise
the IK Handle wont work.
select the wrist joint while you have these selected go in to the
SKELETON>CREATE IK HANDLE. This creates an Ik handle
in our arm. Make sure that the arm bones are bent in a little otherwise
the IK Handle wont work.
Take screen shot (inverse image)
Step 4
Step 4
Now select the Right arm joint bone and then while holding down shift
select the wrist joint while you have these selected go in to the
SKELETON>CREATE IK HANDLE. This creates an Ik handle in
our arm. Make sure that the arm bones are bent in a little otherwise
the IK Handle wont work.
select the wrist joint while you have these selected go in to the
SKELETON>CREATE IK HANDLE. This creates an Ik handle in
our arm. Make sure that the arm bones are bent in a little otherwise
the IK Handle wont work.
NURB Controls


Step 1
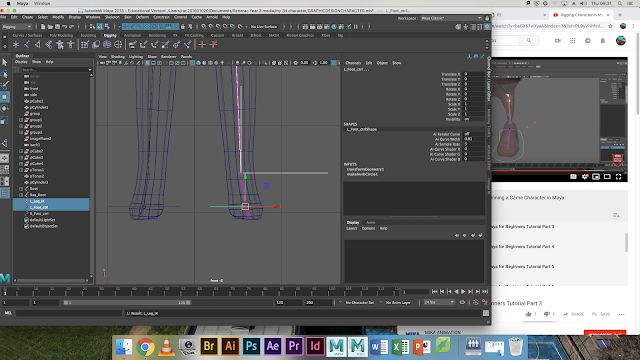
We are now going to create Nurb for the left foot. To do this go in to
TOOLBAR>CREATE>NURB PRIMITIVE>CIRCLE. Now we have
to move the nurb into its right position. To do this use the W key to
move the created nurb circle down to the left foot, the NURB is too large
so use the R key to change the size of the circle. Now rename the NURB
circle in the Outliner window to L_Leg_CTRL.

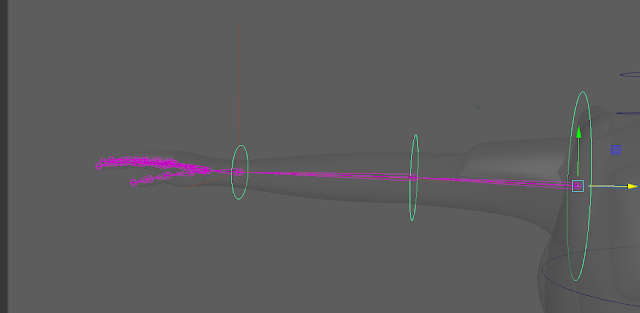
Step 2
To attach the nurb select the nurb by holding down shift and left clicking
on the NURB and then click on the left leg IK and go in to CONSTRAINT>PARENT
which enables us to move our leg using the NURB circle with the W key.
We now need to freeze the transform of the nurb by going in to
EDIT>FREEZE TRANSFORM and then to delete history go in to
EDIT>DELETE HISTORY BY TYPE. This ensures us that if we want to go
back in to T pose we can just enter 0 in to the nurb editor.

Step 3
We are now going to create Nurb for the Right Leg. To do this go in to
TOOLBAR>CREATE>NURB PRIMITIVE>CIRCLE. Now we have to
move the nurb into its right position. To do this use the W key to move
the created nurb circle down to the Right foot, the NURB is too large so
use the R key to change the size of the circle. Now rename the NURB
circle in the Outliner window to L_Right_CTRL.

Step 4
To attach the nurb select the nurb by holding down shift and left clicking
on the NURB and then click on the Right leg IK and go in to
CONSTRAINT>PARENT which enables us to move our leg using the
NURB circle with the W key. We now need to freeze the transform of the
nurb by going in to EDIT>FREEZE TRANSFORM and then to delete
history go in to EDIT>DELETE HISTORY BY TYPE. This ensures us
that if we want to go back in to T pose we can just enter 0 in to the nurb editor.

Step 5
We are now going to create Nurb for the Spine 2/stomach joint .
To do this go in to TOOLBAR>CREATE>NURB PRIMITIVE>CIRCLE.
Now we have to move the nurb into its right position. To do this use the
W key to move the created nurb circle up to the stomach/spine 2 joint, the
NURB is too small so use the R key to change the size of the circle. Now
rename the NURB circle in the Outliner window to Stomach_CTRL.

Step 6
To attach the nurb select the nurb by holding down shift and left clicking
on the NURB and then click on the Spine 2 joint and go in to
CONSTRAINT>ORIENT which enables us to move our Stomach using the
NURB circle with the E key. We now need to freeze the transform of the nurb
by going in to EDIT>FREEZE TRANSFORM and then to delete history go
in to EDIT>DELETE HISTORY BY TYPE. This ensures us that if we want to
go back in to T pose we can just enter 0 in to the nurb editor.

Step 7
We are now going to create Nurb for the Spine 3/Chest joint . To do this go in
to TOOLBAR>CREATE>NURB PRIMITIVE>CIRCLE. Now we have to
move the nurb into its right position. To do this use the W key to move the created
nurb circle up to the Chest/spine 3 joint, the NURB is too small so use the R key
to change the size of the circle. Now rename the NURB circle in the Outliner
window to Chest_CTRL.
Step 8
To attach the nurb select the nurb by holding down shift and left clicking on
the NURB and then click on the Spine 3 joint and go in to CONSTRAINT>ORIENT
which enables us to move our Chest using the NURB circle with the E key.
We now need to freeze the transform of the nurb by going in to
EDIT>FREEZE TRANSFORM and then to delete history go in to
EDIT>DELETE HISTORY BY TYPE. This ensures us that if we want to go back in
to T pose we can just enter 0 in to the nurb editor.

Step 9
We are now going to create Nurb for the Neck Joint . To do this go in to
TOOLBAR>CREATE>NURB PRIMITIVE>CIRCLE. Now we have to
move the nurb into its right position. To do this use the W key to move
the created nurb circle up to the Neck joint, the NURB is too small so use
the R key to change the size of the circle. Now rename the NURB circle
in the Outliner window to Neck_CTRL.
Step 10
To attach the nurb select the nurb by holding down shift and left clicking
on the NURB and then click on the Neck joint and go in to
CONSTRAINT>ORIENT which enables us to move our
Neck using the NURB circle with the E key. We now need to
freeze the transform of the nurb by going in to EDIT>FREEZE TRANSFORM
and then to delete history go in to EDIT>DELETE HISTORY BY TYPE.
This ensures us that if we want to go back in to T pose we can just enter 0
in to the nurb editor.

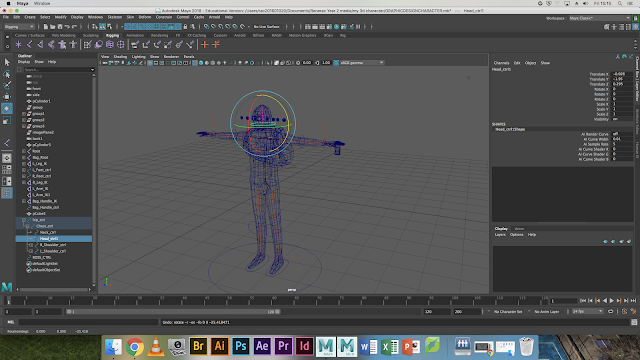
Step 11
We are now going to create Nurb for the head Joint . To do this go in
to TOOLBAR>CREATE>NURB PRIMITIVE>CIRCLE. Now we have
to move the nurb into its right position. To do this use the W key to move
the created nurb circle up to the head joint, the NURB is too small so
use the R key to change the size of the circle. Now rename the NURB
circle in the Outliner window to head_CTRL.
Step 12
To attach the nurb select the nurb by holding down shift and left clicking
on the NURB and then click on the head joint and go in to CONSTRAINT>ORIENT
which enables us to move our head using the NURB circle with the E key.
We now need to freeze the transform of the nurb by going in to
EDIT>FREEZE TRANSFORM and then to delete history go in to
EDIT>DELETE HISTORY BY TYPE. This ensures us that if we
want to go back in to T pose we can just enter 0 in to the nurb editor.

Step 13
We are now going to create Nurb for the Left Arm/elbow/wrist Joint .
To do this go in to TOOLBAR>CREATE>NURB PRIMITIVE>CIRCLE
repeat this process 3x . Now we have to move the nurb into its right position.
To do this use the W key to move the created nurb circle up to the
Arm/elbow/wrist joint, the NURBs are too small/large so use the R key
to change the size of the circle. Now rename the NURB circle in the
Outliner window to L_Arm_CTRL. L_Elbow_CTRL.L_Wrist_CTRL.
Step 14
To attach the nurb select the nurb by holding down shift and left clicking
on the NURB and then click on the Arm joint and go in to CONSTRAINT>ORIENT
which enables us to move our Arm using the NURB circle with the E key.
Repeat this process for the Elbow and Wrist Ctrls. We now need to freeze
the transform of the nurb by going in to EDIT>FREEZE TRANSFORM and
then to delete history go in to EDIT>DELETE HISTORY BY TYPE.Repeat
this process for the Elbow and Wrist Ctrls. This ensures us that if we want
to go back in to T pose we can just enter 0 in to the nurb editor.
INVERSE SCREEN SHOT
Step 15
Step 15

We are now going to create Nurb for the Right Arm/elbow/wrist Joint .
To do this go in to TOOLBAR>CREATE>NURB PRIMITIVE>CIRCLE
repeat this process 3x . Now we have to move the nurb into its right position.
To do this use the W key to move the created nurb circle up to the Arm/elbow/wrist
joint, the NURBs are too small/large so use the R key to change the size of the
circle. Now rename the NURB circle in the Outliner window to R_Arm_CTRL.
R_Elbow_CTRL.R_Wrist_CTRL.
Step 16
To attach the nurb select the nurb by holding down shift
and left clicking on the NURB and then click on the Arm
joint and go in to CONSTRAINT>ORIENT which enables
us to move our Arm using the NURB circle with the
E key.Repeat this process for the Elbow and Wrist Ctrls.
We now need to freeze the transform of the nurb by going
in to EDIT>FREEZE TRANSFORM and then to delete history
go in to EDIT>DELETE HISTORY BY TYPE.Repeat this process
for the Elbow and Wrist Ctrls. This ensures us that if we want to go
back in to T pose we can just enter 0 in to the nurb editor.
Step 17
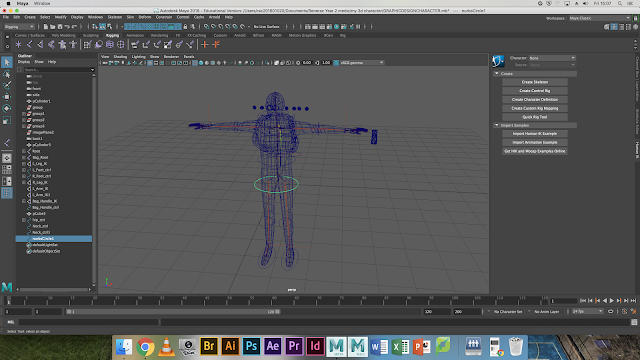
We are now going to create Nurb for the whole body.
To do this go in to TOOLBAR>CREATE>NURB PRIMITIVE>CIRCLE.
Now we have to move the nurb into its right position.
To do this use the W key to move the created nurb circle down underneath the body,
the NURBs are too small/large so use the R key to change the size of the
circle. Now rename the NURB circle in the Outliner window to Big Boss .

and left clicking on the NURB and then click on the Arm
joint and go in to CONSTRAINT>ORIENT which enables
us to move our Arm using the NURB circle with the
E key.Repeat this process for the Elbow and Wrist Ctrls.
We now need to freeze the transform of the nurb by going
in to EDIT>FREEZE TRANSFORM and then to delete history
go in to EDIT>DELETE HISTORY BY TYPE.Repeat this process
for the Elbow and Wrist Ctrls. This ensures us that if we want to go
back in to T pose we can just enter 0 in to the nurb editor.


Step 17
We are now going to create Nurb for the whole body.
To do this go in to TOOLBAR>CREATE>NURB PRIMITIVE>CIRCLE.
Now we have to move the nurb into its right position.
To do this use the W key to move the created nurb circle down underneath the body,
the NURBs are too small/large so use the R key to change the size of the
circle. Now rename the NURB circle in the Outliner window to Big Boss .

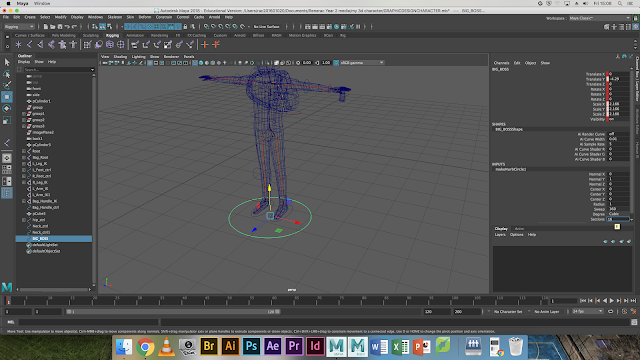
Step 18
To attach the Nurb go in to the outliner and move every nurb and
ik handle in to the big boss which basically puts big boss in charge.
To mave the body with the big boss hold shift and left click the
big boss nurb and the root bone and then go CONSTRAINT>ORIENT and
then go CONSTRAINT>PARENT which enables us to move our full rig
using W key and E key. we then need to EDIT>FREEZE TRANSFORM and then to delete history
go in to EDIT>DELETE HISTORY BY TYPE.Repeat this process
for the Elbow and Wrist Ctrls. This ensures us that if we want to go
back in to T pose we can just enter 0 in to the nurb editor.
TEXTURING

Step 1
To texture your character you first need to get your textures. You can get your textures using different techniques. The first is to download royalty free textures. The second way is to create your textures using various photo editing software and the last way is to import your textures from clothes/objects by using a printer. Here are my main two textures which I scanned in. To download textures just search up ROYALTY FREE TEXTURES and make sure that they are in a good resolution.
Step 2
To apply textures select your 3D model and hold down the LEFT MOUSE BUTTON>FACE. Now that you have entered face mode hold down SHIFT and select the faces to which you want to apply your materials.
Step 3
Now click the RIGHT MOUSE BUTTON>APPLY NEW MATERIAL-LAMBERT. You now have to click the tiled button in the attributes and then the plug in button.Now select FILE and locate your texture and click open. This applies your texture to your selected faces.
Now we have to make the textures look realistic to do this, in the TOOLBAR>UV>UV planar. This sets the texture to the right size so that they are not deformed.
Step 4
To apply your different textures select your 3D model and hold down the LEFT MOUSE BUTTON>FACE. Now that you have entered face mode hold down SHIFT and select the faces to which you want to apply your materials.
Step 5
Now click the RIGHT MOUSE BUTTON>APPLY NEW MATERIAL-LAMBERT. You now have to click the tiled button in the attributes and then the plug in button.Now select FILE and locate your next texture and click open. This applies your texture to your selected faces.Now we have to make the textures look realistic to do this, in the TOOLBAR>UV>UV planar. This sets the texture to the right size so that they are not deformed.
Step 6
To apply your different textures select your 3D model and hold down the LEFT MOUSE BUTTON>FACE. Now that you have entered face mode hold down SHIFT and select the faces to which you want to apply your materials.
Step 7
Now we are going to apply a metal texture. To do this RIGHT MOUSE BUTTON>APPLY NEW MATERIAL-BLIN. This applies a shiny texture to the selected faces.Now go to the TOOLBAR>UV>UV planar. This sets the texture to the right size so that they are not deformed and look realistic.
Step 8
Repeat these processes applying different materials and textures to your character model.
ANIMATION
Step 1
When we create an animation we have to remember the frame rate of our animation.The more frames per second you have the smoother the animation will be. The common frames per second are 4fps,8fps,12fps,15fps,24fps,30fps,60fps, if you have more frames then the animation can be very be smooth and fluent . Its up to you to choose the number of frames but remember that more frame rates = more work on your graphics card. the number of fps I would recommend would be between 15fps-24fps because then it makes the animation look fluent and the graphics card wont be over worked.
We need to go in to the Animation menu to animate our character. To do this go in to the tool menu and change it in to ANIMATION. This change our modelling and rigging tool set in to ANIMATION.


Step 2


Step 3
To animate the rest of the movement we have to first have to use our Nurb circles to create a pose and hen we have a pose created select the base NURB cotrl and pressing the HOTKEY S to set a keyframe in the nimation timeline. To create movement drag the keyframe on the time line a bit more and reset your pose and then again press the HOTKEY S to create another set keyframe and create movement. The closer the keyframe are the faster the animations are and the further the key frames are then the slower the animations are.


Step 4
We will repeat step 2 while following our story board so that we have a continuous and chronological story by just using the same technique of animation. As you can see in the images above we can see that by using the technique in step 1 I have animated my character to jump down and land on all fours in a quick and realistic fashion.
Step 5
After you have done all of your animations you probably want to see what it looks like. To avoid rendering the video and then seeing problems you can PLABLAST your anim. To do this RIGHT CLICK>PLAYBLAST on the time line. This plays the animation from your selected camera view. This is a fast way to see your animation and see where your problems are and what you need to fix or replace.
LIGHTING

Step1
To create lights you have to know which rendering software we are using. In this project we are using the Arnold Rendering software therefore we are going to use the Arnold lights. To access these lights select the Arnold tab and import a global light and a spot light in the toolbar.


Step 2
To move your lights use the W HOTKEY, to rotate your lights use the HOTKEY E and to change the size of your lights use the R HOTKEY. When you have placed your lights in to position we now need to change their properties to set the right mood.
Step 3
Select one of your lights and go in to the ATTRIBUTES panel. change the intensity to 10 of your spot light. You can also change the intensity to what you will need
Step 4
Now that we have created our lights our project should look something like this. This will change depending on your scene, theme and size of your project.
Comments
Post a Comment